
Introduction
Selling on credit can help businesses build stronger customer relationships and increase sales, but it also creates financial risk. If a customer continues purchasing while older invoices remain unpaid, the outstanding balance can grow quickly and affect cash flow.
Odoo 19 helps businesses monitor this risk through the Sales Credit Limit feature. It allows a company to define a standard credit threshold, set a different limit for selected customers, and view the customer's receivable position while processing sales.
In this guide, we will configure the feature step by step and then use a simple example to understand what happens when a customer's credit exposure reaches the configured limit.
What Is a Sales Credit Limit?
A sales credit limit is the maximum credit exposure a business is willing to allow for a customer. It gives sales and accounting teams a clear point at which the customer's outstanding position should be reviewed before more credit is extended. This helps businesses reduce the risk of excessive unpaid balances while maintaining better control over customer transactions. It also supports healthier cash flow by encouraging timely review of outstanding receivables.
Why Credit Limits Matter
● Help accounting teams monitor receivables more consistently.
● Give salespeople visibility into a customer's credit position.
● Reduce the risk of excessive unpaid customer balances.
● Support better cash-flow and credit-control decisions.
● Allow different credit policies for different customers.
How the Odoo 19 Credit-Limit Flow Works
|
1. Configure Enable feature |
2. Assign Set customer limit |
3. Monitor Check receivable |
4. Sell Create quotation |
5. Review See warning |
Step 1: Enable Sales Credit Limit
First, activate the feature from the Accounting application.
1. Open Accounting.
2. Go to Configuration → Settings.
3. Find the Customer Invoices section.
4. Enable Sales Credit Limit.
5. Enter the default credit limit if required.
6. Click Save.
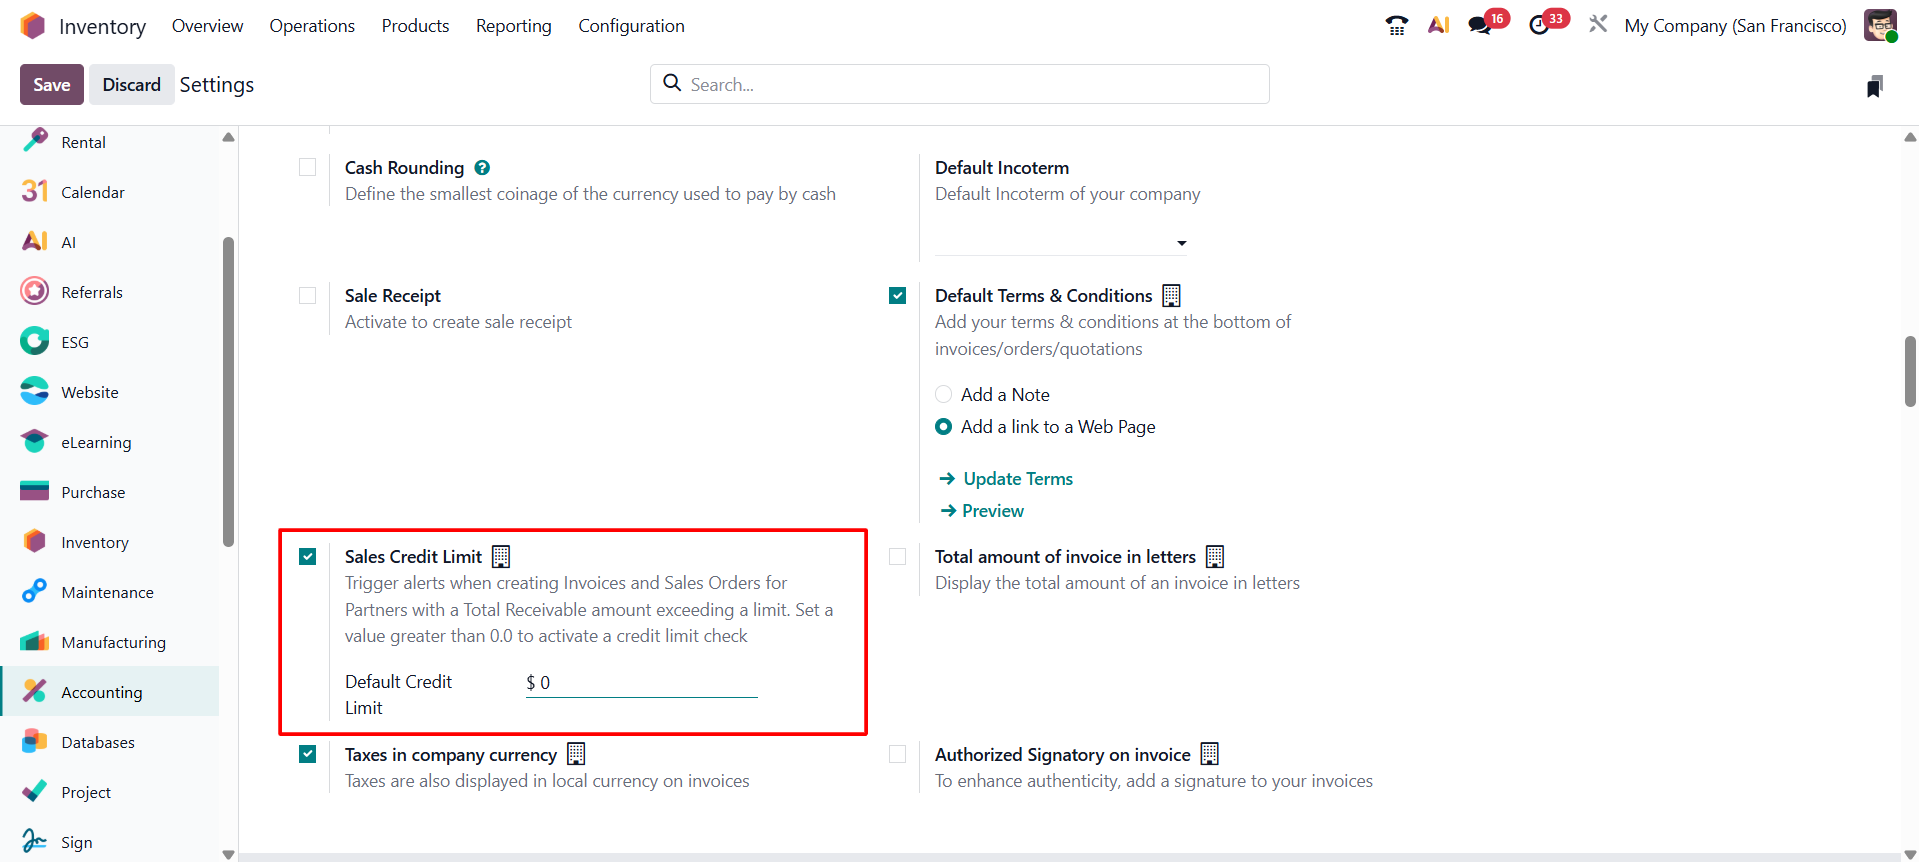
Once enabled, you can set a default credit limit that applies to all customers. For individual limits, open the customer's Accounting tab and configure the Credit Limit separately.
Step 2: Define the Default Credit Limit
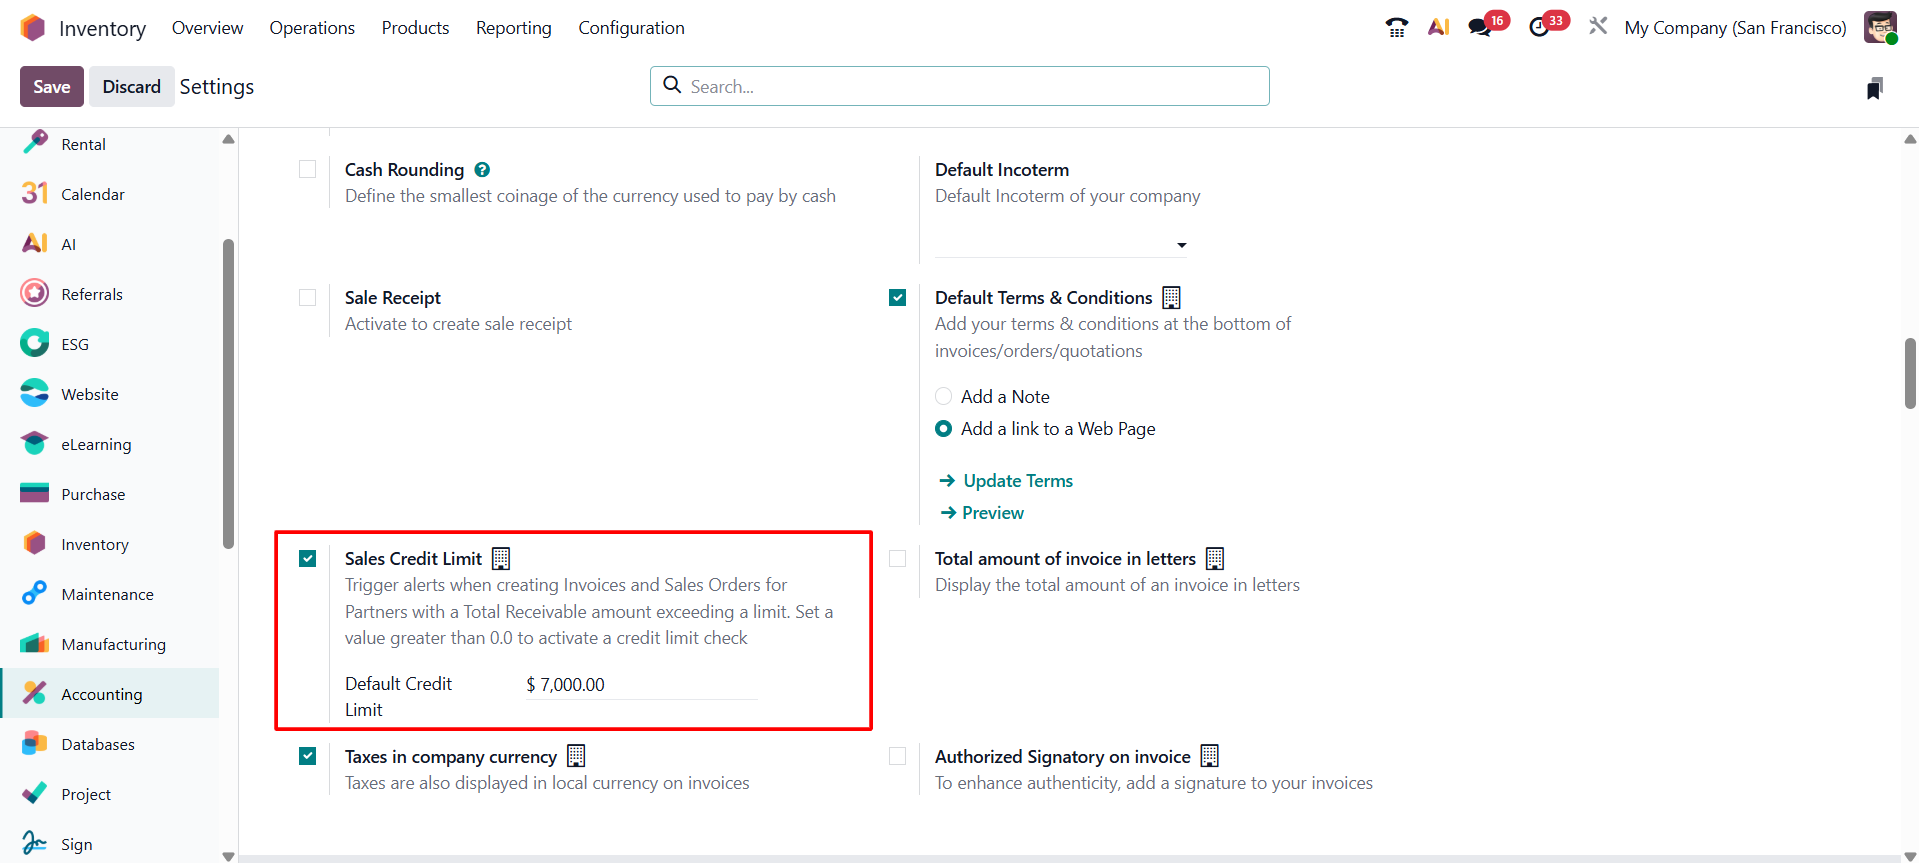
The default credit limit acts as the general credit threshold used by the business. This is useful when most customers follow the same credit policy.
EXAMPLE
If the default credit limit is $7,000, that amount becomes the standard threshold unless a different Partner Limit is set for a particular customer.
Step 3: Set a Customer-Specific Partner Limit
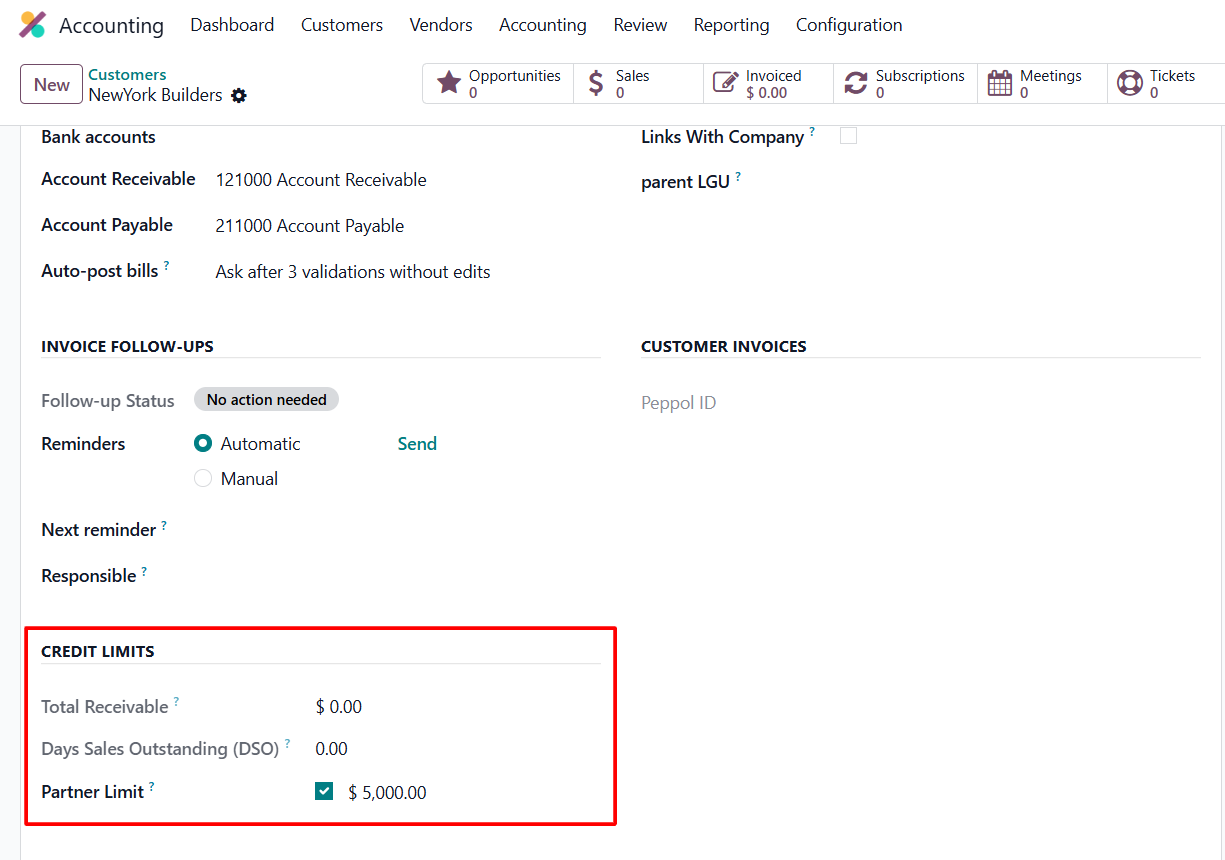
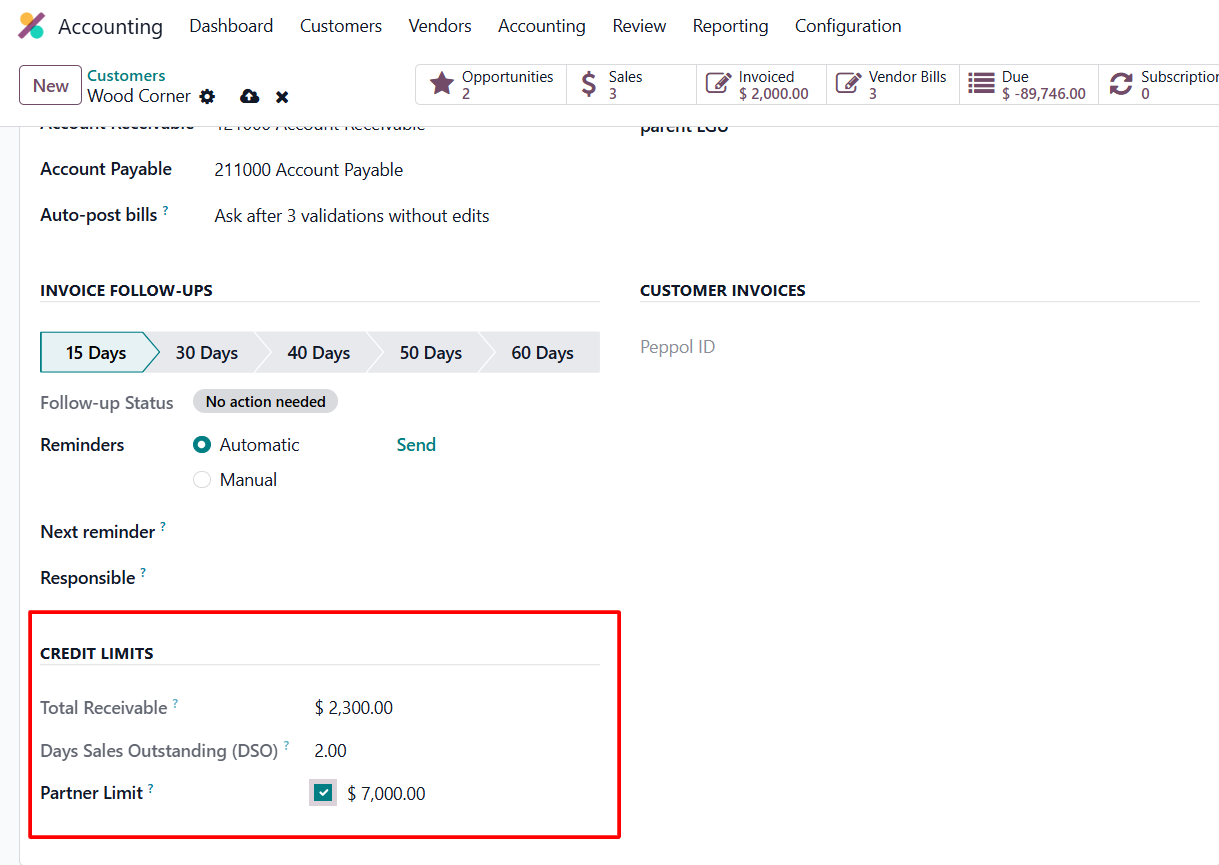
Not every customer needs the same credit limit. Odoo 19 allows you to assign an individual Partner Limit when a customer should have a different threshold from the default. In the customer contact form, in the Accounting tab, under the Credit limit section. There the Total Receivable of the customer, Days Sales Outstanding (DSO), and Partner Limit options are available.
1. Go to Accounting → Customers → Customers.
2. Open the required customer.
3. Open the Accounting tab.
4. Locate the Partner Limit option.
5. Set the customer's individual credit limit.
6. Save the customer.
Step 4: Understand Total Receivable
The Total Receivable value shows the amount the customer currently owes according to the accounting records. Comparing this amount with the credit limit helps users understand how much credit exposure already exists.
|
Credit Limit |
Total Receivable |
Position Before New Sale |
|
$7,000 |
$2,300 |
$4,700 below the limit |
This does not mean the remaining amount should always be treated as an automatic approval. Businesses should also consider overdue invoices, payment behavior, and their internal credit policy.
Step 5: Test the Credit Warning in Sales
After the limit is configured, create a controlled test quotation to see how the credit information affects the sales workflow.
1. Go to Sales → Orders → Quotations.
2. Create a new quotation.
3. Select the customer whose credit limit you configured.
4. Add products or services.
5. Use an order value that takes the customer's exposure above the configured limit.
6. Review the credit warning shown on the sales document.
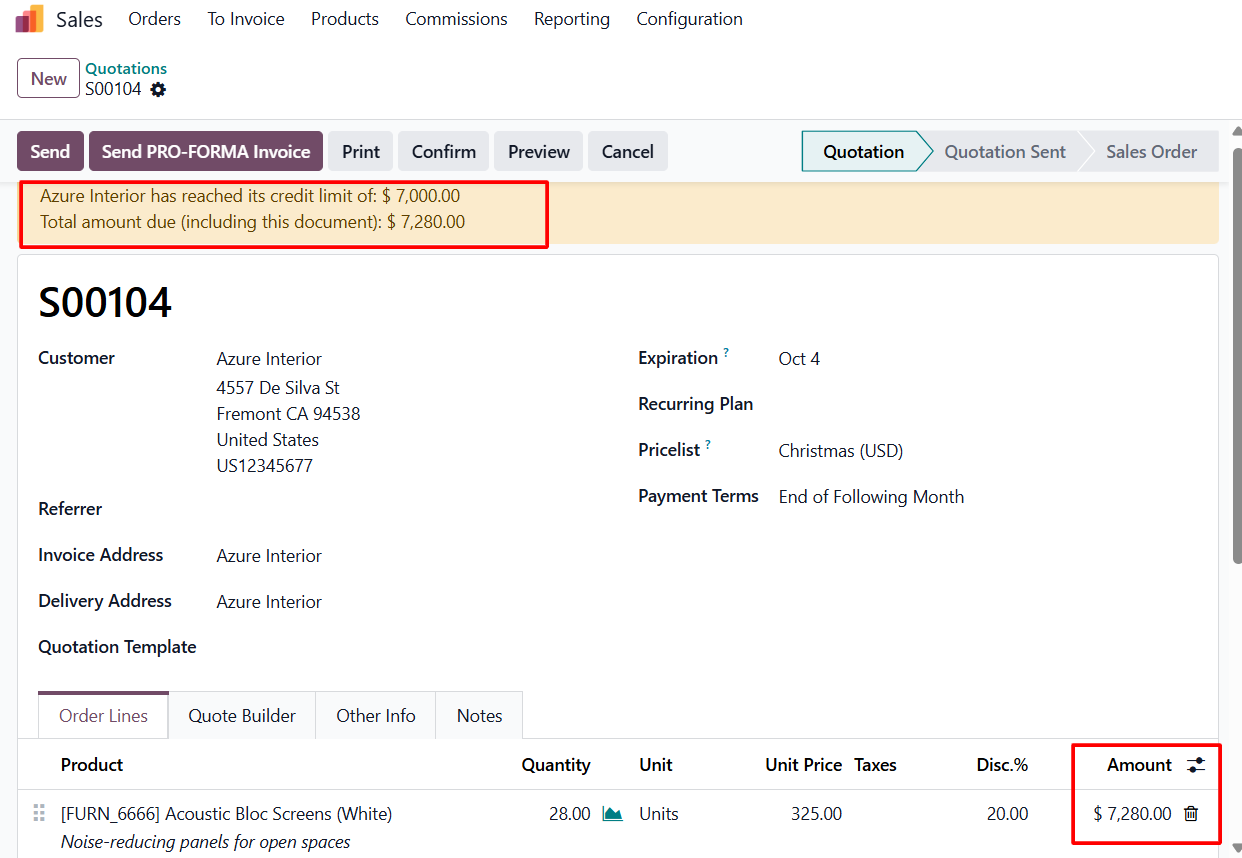
Here when the total amount becomes $7280, two notifications are displayed at the top of the sale order. The customer has reached the credit limit of $7,000, and the total amount due (Including this document) is $7280. These are the two notifications provided in the sales quotation. Then click the confirm button to confirm the quotation.
Now create an invoice and complete the sale order for the customer. The next step is to create a quotation for the customer who has a credit limit of $5,000.
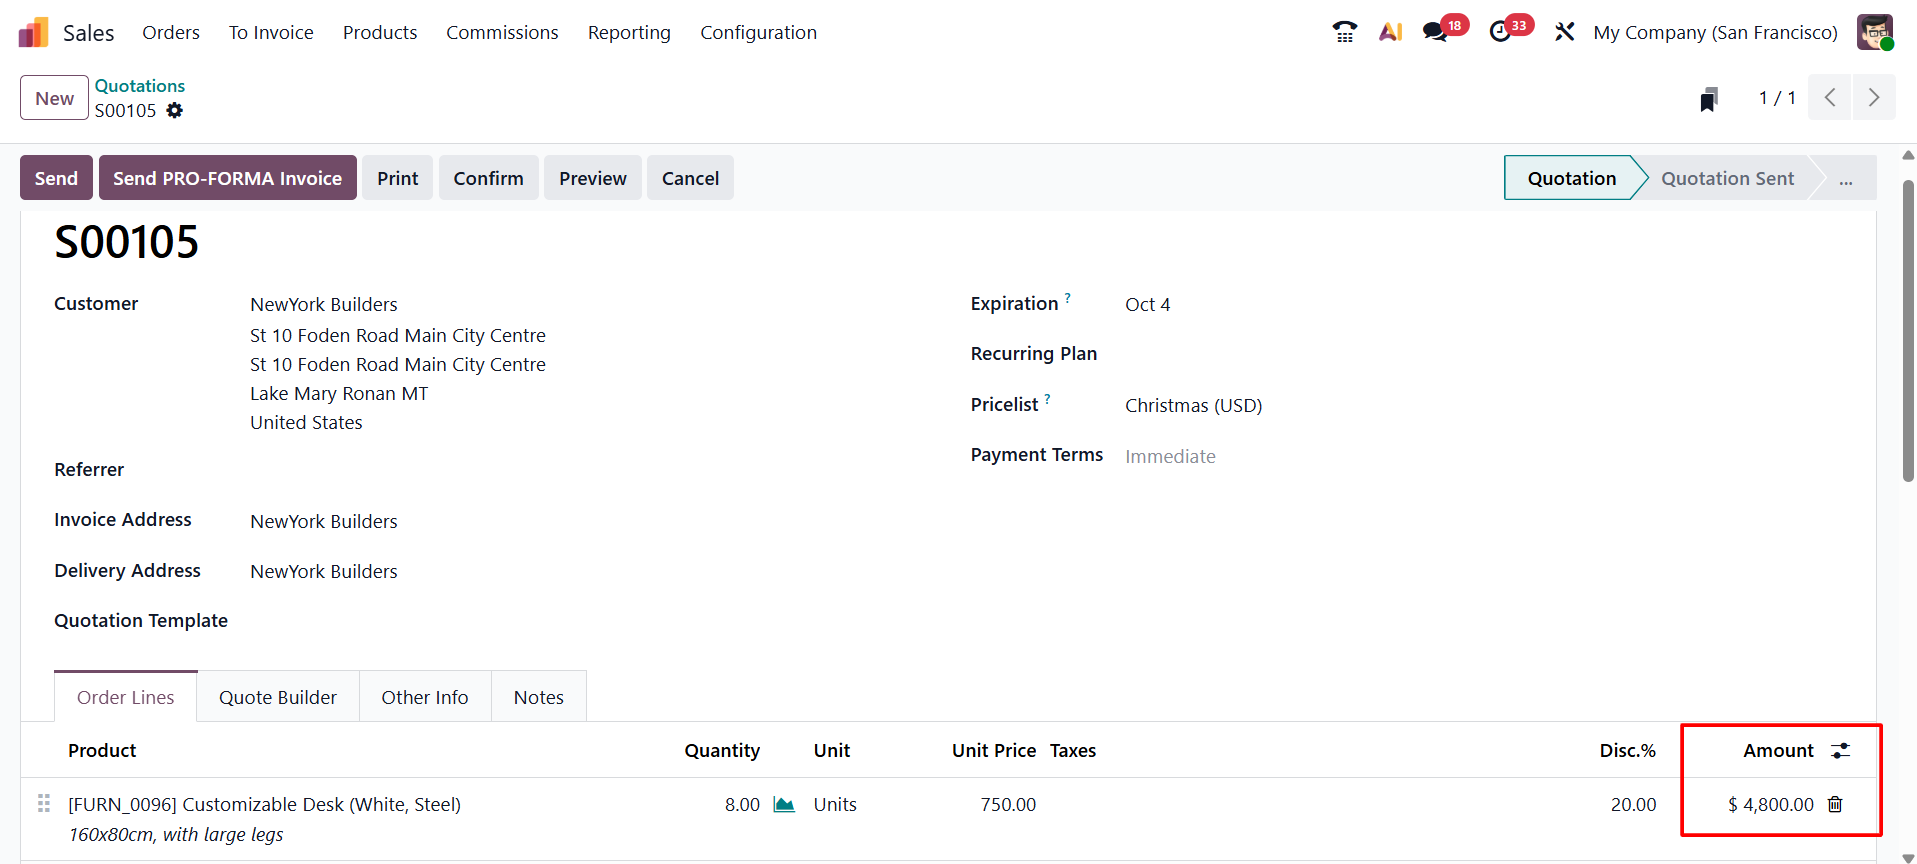
The quotation amount is $4,800, while New York Builders has a $5,000 credit limit. Adding more quantity and exceeding the limit will trigger a credit-limit warning.
What Is the Impact When the Limit Is Exceeded?
When the credit threshold is exceeded, the important point is not simply the number itself. The warning gives the business a signal that the customer's outstanding exposure deserves attention. The final decision should follow your company's credit policy and approval process.
The main impact of this standard credit-limit workflow is visibility. When the customer's exposure exceeds the configured threshold, Odoo warns the user so the situation can be reviewed before more credit is extended.
Depending on the company's internal policy, the user may :
‣ Proceed because the customer is trusted and the
exception is acceptable.
‣ Ask the customer to pay part of the outstanding balance first.
‣ Review the customer's payment history before continuing.
‣ Ask accounting or management to review the order.
‣ Wait until an older invoice is settled.
Review Customer Balances with Partner Ledger
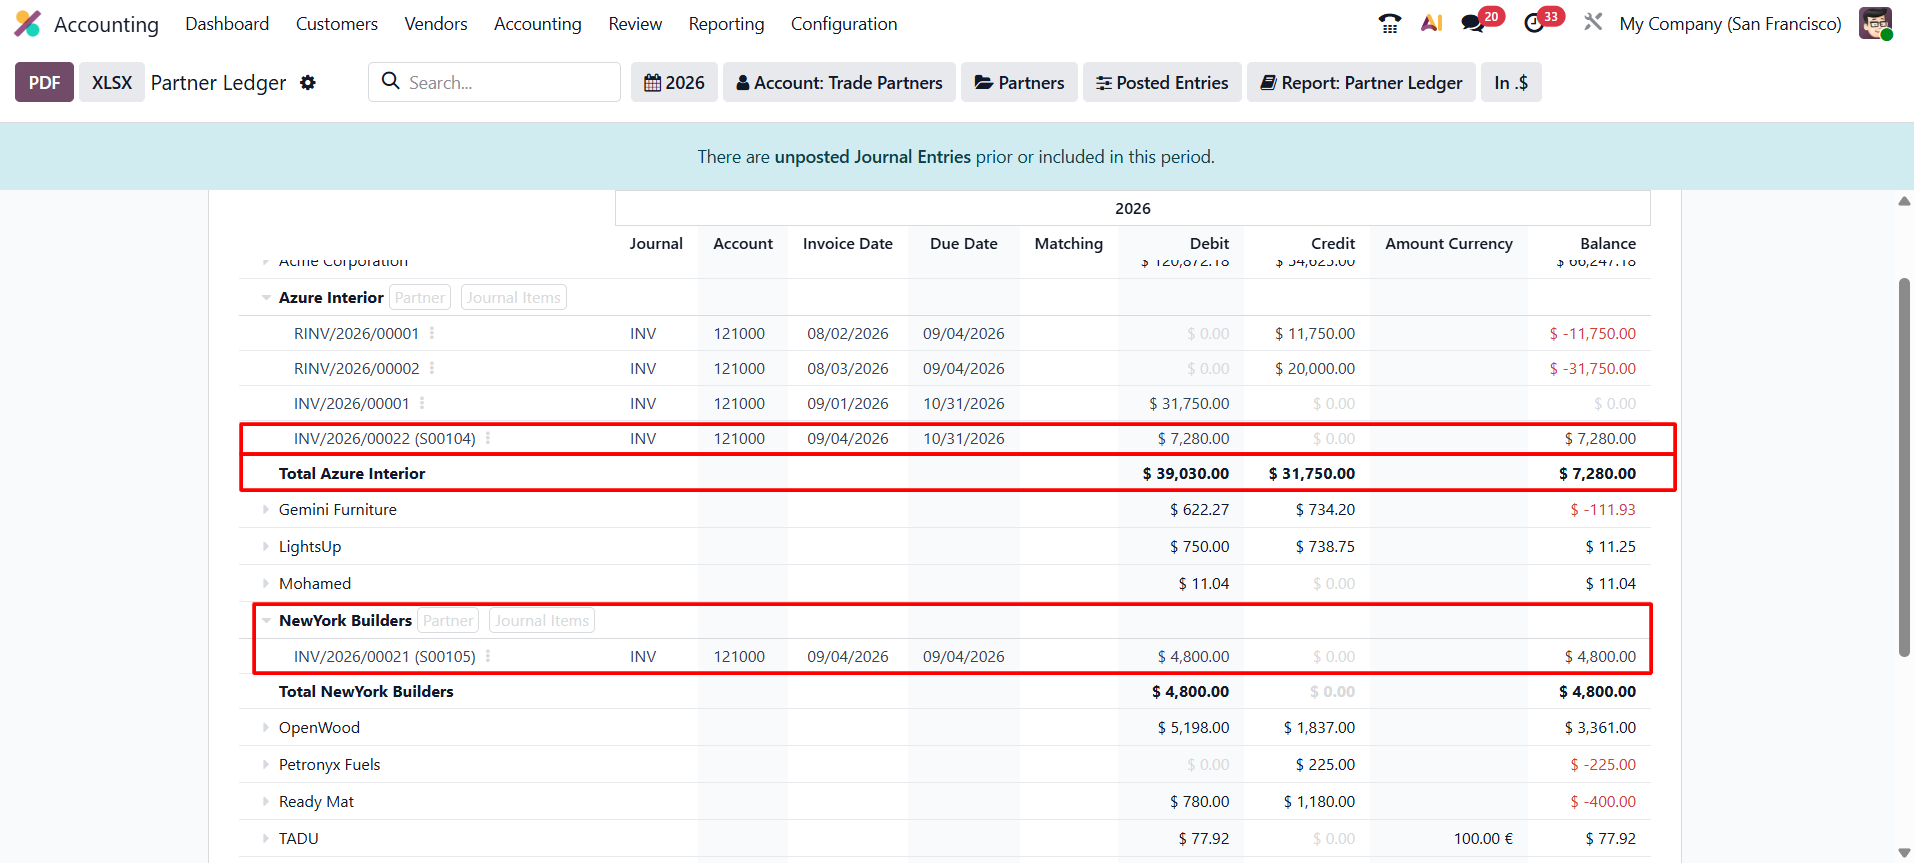
For a more detailed accounting view, use the Partner Ledger. It helps users review the customer's accounting entries and understand the balance behind the receivable amount.
1. Go to Accounting → Reporting → Partner Ledger.
2. Filter the report for the required customer.
3. Review invoices, payments, and the resulting balance.
4. Use this report when investigating a high or unusual receivable position.
Benefits of Using Sales Credit Limits
|
Benefit |
Business Impact |
|
Better credit control |
Creates a clear threshold for reviewing customer exposure. |
|
Reduced financial risk |
Helps identify customers accumulating large unpaid balances. |
|
Improved cash-flow awareness |
Keeps receivables visible during the sales process. |
|
Better sales decisions |
Gives salespeople useful financial context before extending more credit. |
|
Customer flexibility |
Allows individual limits for customers with different credit profiles. |
Conclusion
Sales Credit Limits in Odoo 19 provide a simple way to bring credit awareness into everyday sales and accounting operations. By enabling the feature, setting a default threshold, configuring customer-specific Partner Limits, and monitoring Total Receivable, businesses can identify credit risk earlier.
The feature is most effective when it is supported by a clear internal credit policy. Sales teams should understand what the warning means, while accounting or management should define when an exception is acceptable.
With these controls in place, Odoo 19 can help businesses balance sales opportunities with more disciplined receivable and credit management.