

An organized sales process helps businesses respond to customer requests, prepare accurate quotations, fulfil orders on time, and collect payments efficiently. When sales, inventory, and accounting activities are disconnected, teams may need to enter the same information more than once or spend extra time tracking order status.
The Odoo 19 Sales application brings these activities together in a connected workflow. Businesses can prepare quotations, confirm accepted offers as sales orders, coordinate product deliveries with Inventory, create customer invoices, and record payments through the accounting workflow. Linked documents make it easier to trace each transaction from the initial offer through fulfilment and billing.
This guide explains the standard Odoo 19 sales process step by step, including the purpose of each stage, the actions users need to perform, and how each document connects to the next. Screens and available actions can vary depending on installed applications, access rights, product type, and company configuration.
1. Prepare the Sales Configuration
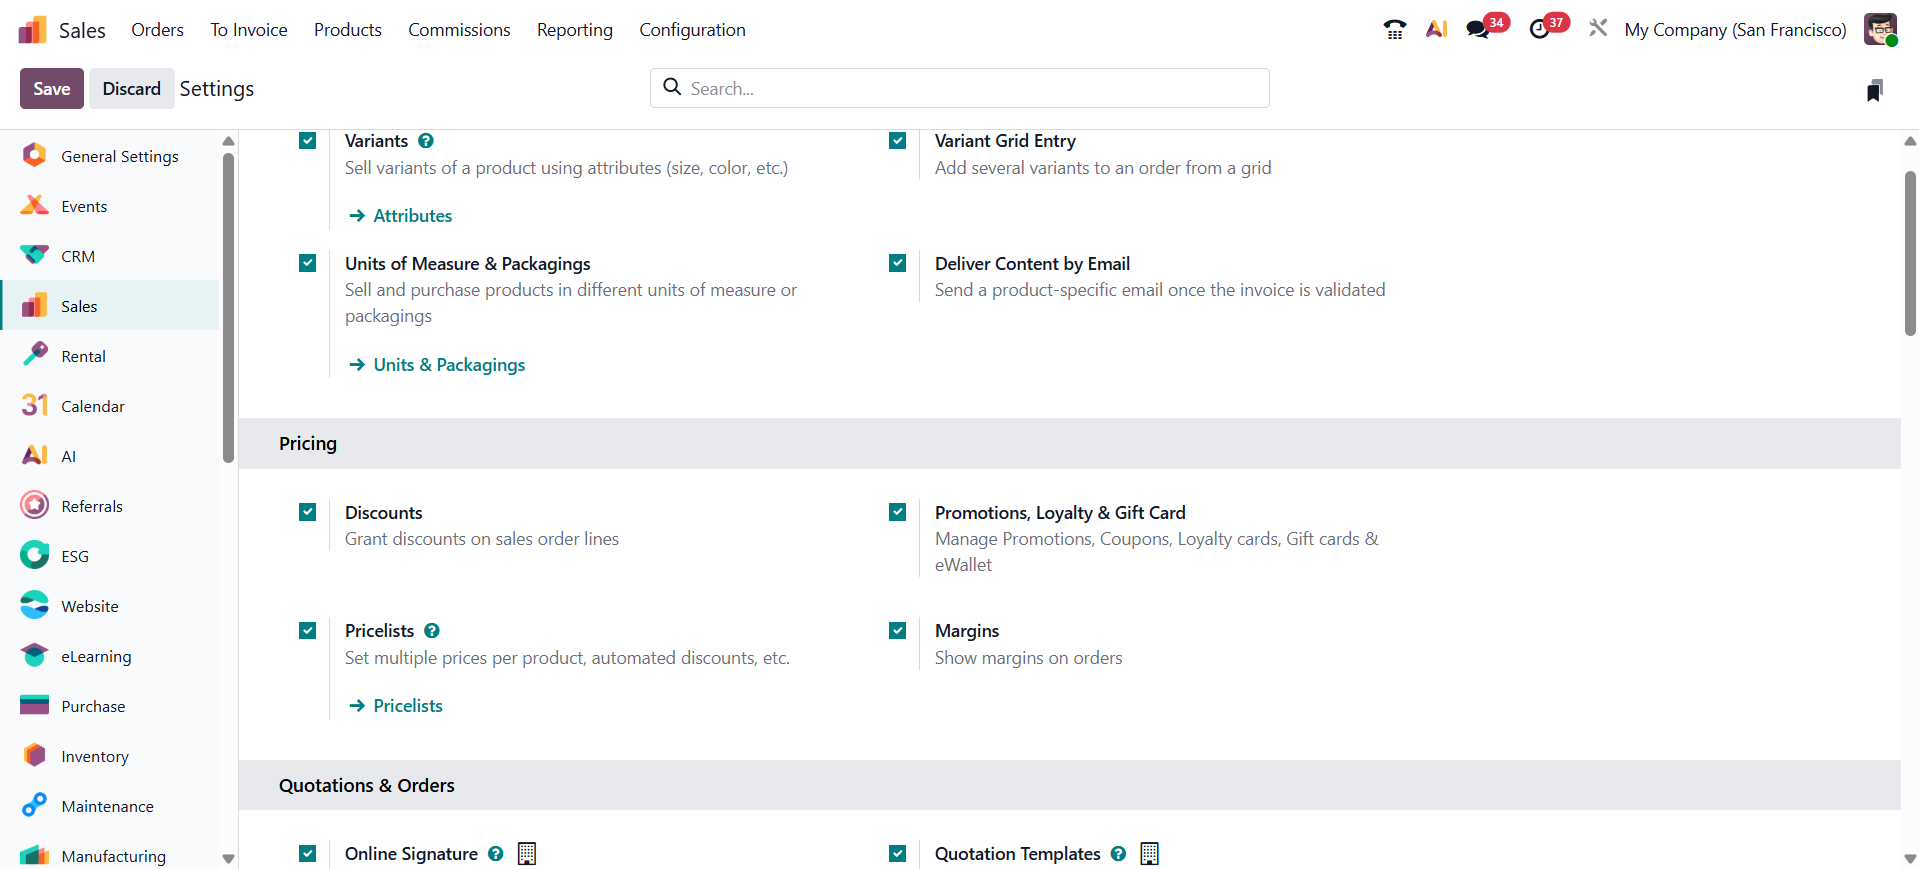
Before creating a quotation, verify the basic settings and records. Preparing these items helps avoid pricing errors and interruptions during order processing.
Open Sales: Launch the Sales application from the Odoo app dashboard.
Review Sales settings: Go to Sales → Configuration → Settings and check relevant options such as quotation features, pricelists, online signatures, and online payments.
Verify products and services: Check product names, sales prices, units of measure, taxes, and product types.
Verify customer details: In Contacts, review the customer's name, email, invoice address, delivery address, and required commercial details.
Check invoicing policy: For products, confirm whether invoicing is based on ordered quantities or delivered quantities.
2. Create a Quotation in Odoo 19
A quotation is a formal offer that outlines the products or services proposed to a customer, including quantities, prices, taxes, and commercial terms. It gives the customer an opportunity to review the offer before it becomes a confirmed order.
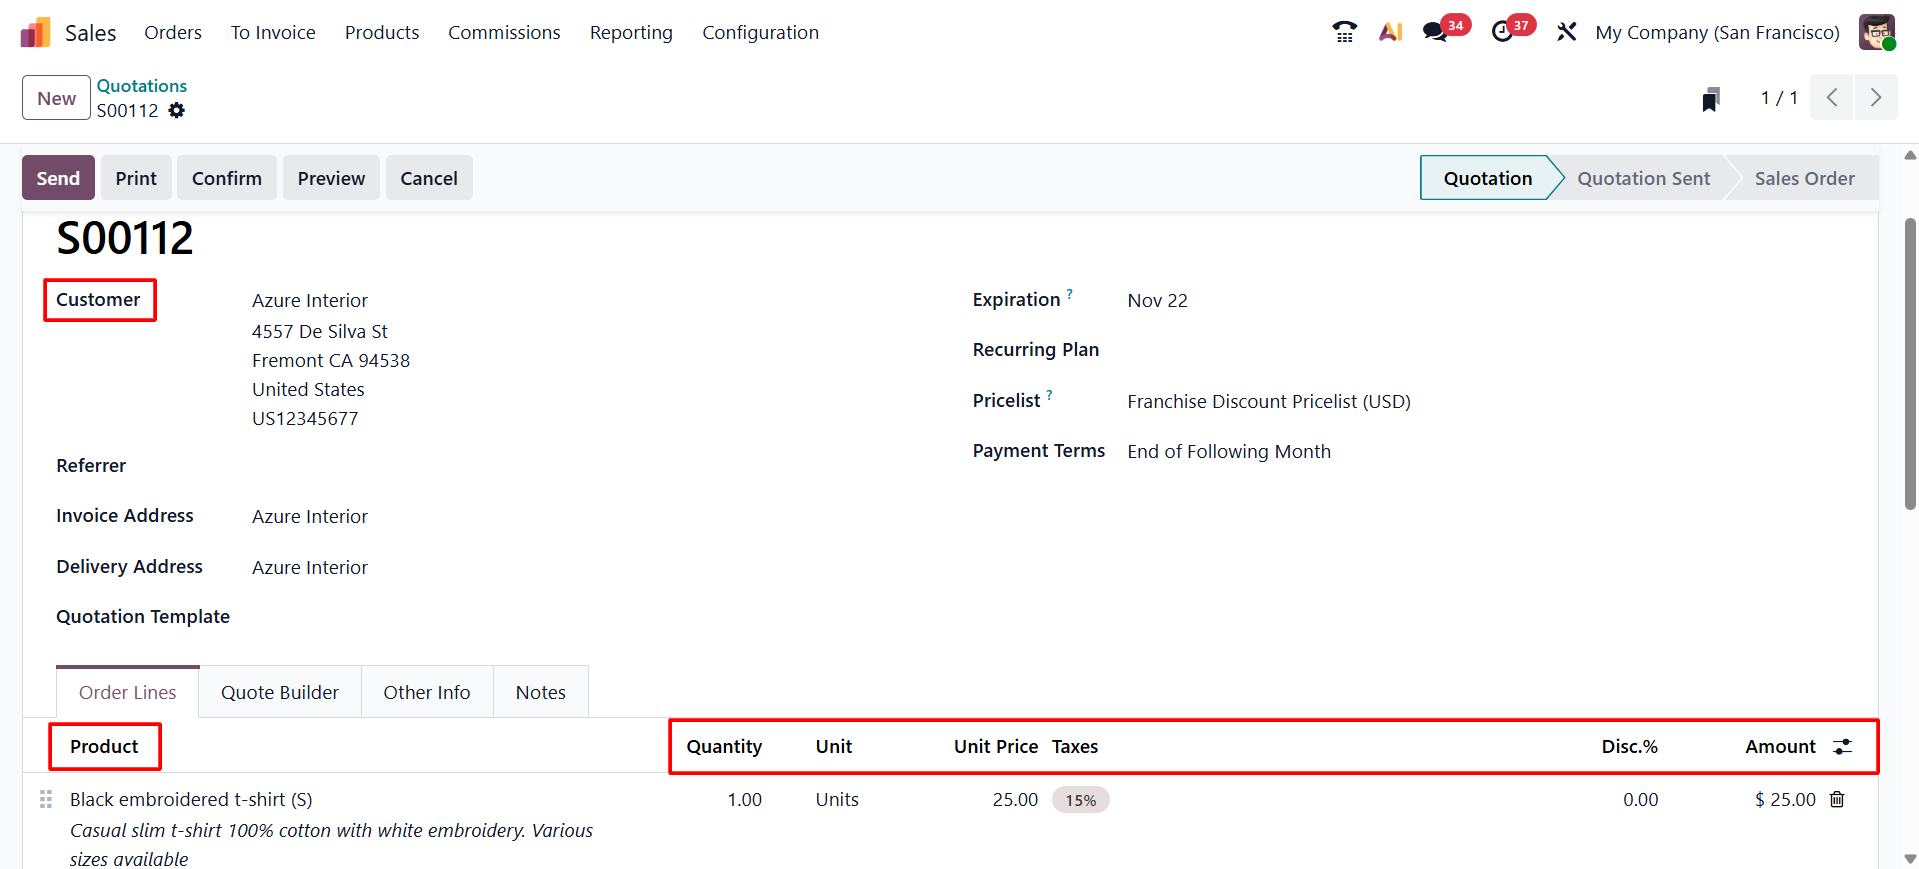
Open Quotations: Go to Sales → Orders → Quotations and click New.
Select the customer: Choose the customer record so Odoo can populate available contact and address information.
Complete quotation details: Review the quotation date, expiration date, pricelist, payment terms, and other required fields.
Add order lines: Select products or services, enter quantities, and review unit prices, discounts, and taxes.
Review the total: Verify the untaxed amount, taxes, and final total before sending the quotation.
3. Send the Quotation to the Customer
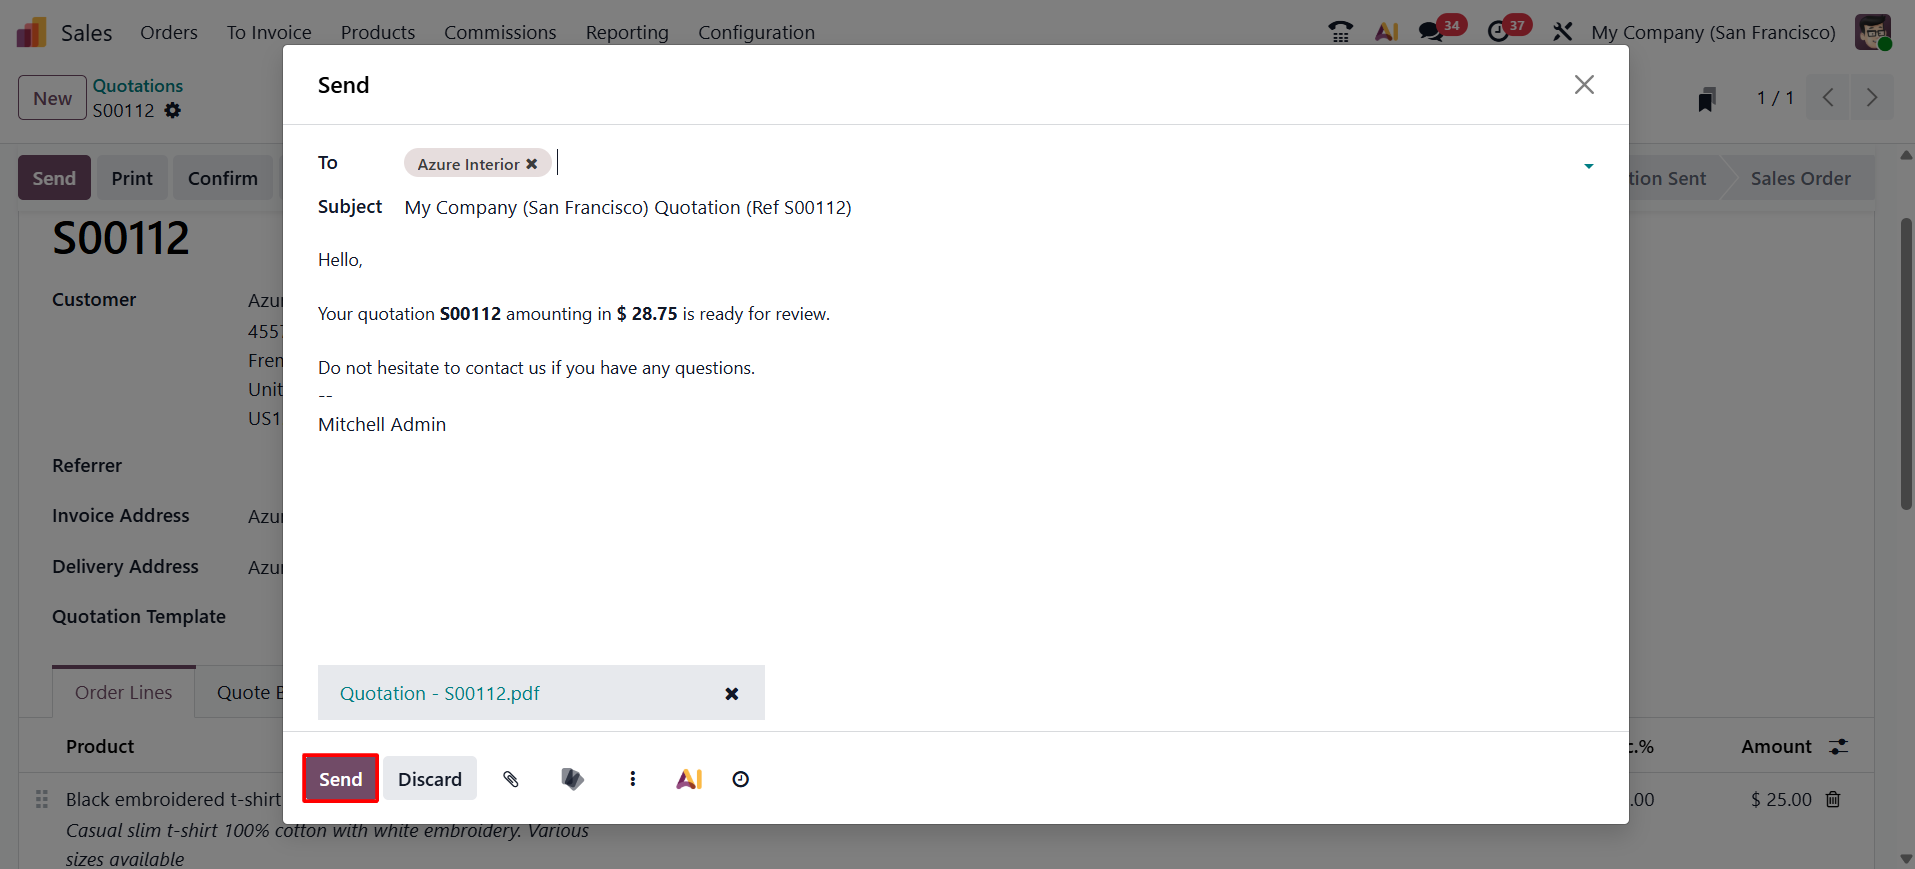
After checking the quotation, send it to the customer for review. With email configured, Odoo can prepare an email containing the quotation as a PDF attachment.
Select Send by Email: Review the recipient, subject, message, and attached quotation.
Check the PDF: Make sure product descriptions, quantities, prices, taxes, and terms are correct.
Send the offer: Send the email or use the sharing method agreed with the customer.
If online quotation signing or payment is enabled, the customer may be able to accept the offer through the customer portal. Otherwise, acceptance can be handled through the business's usual communication process.
4. Confirm the Quotation
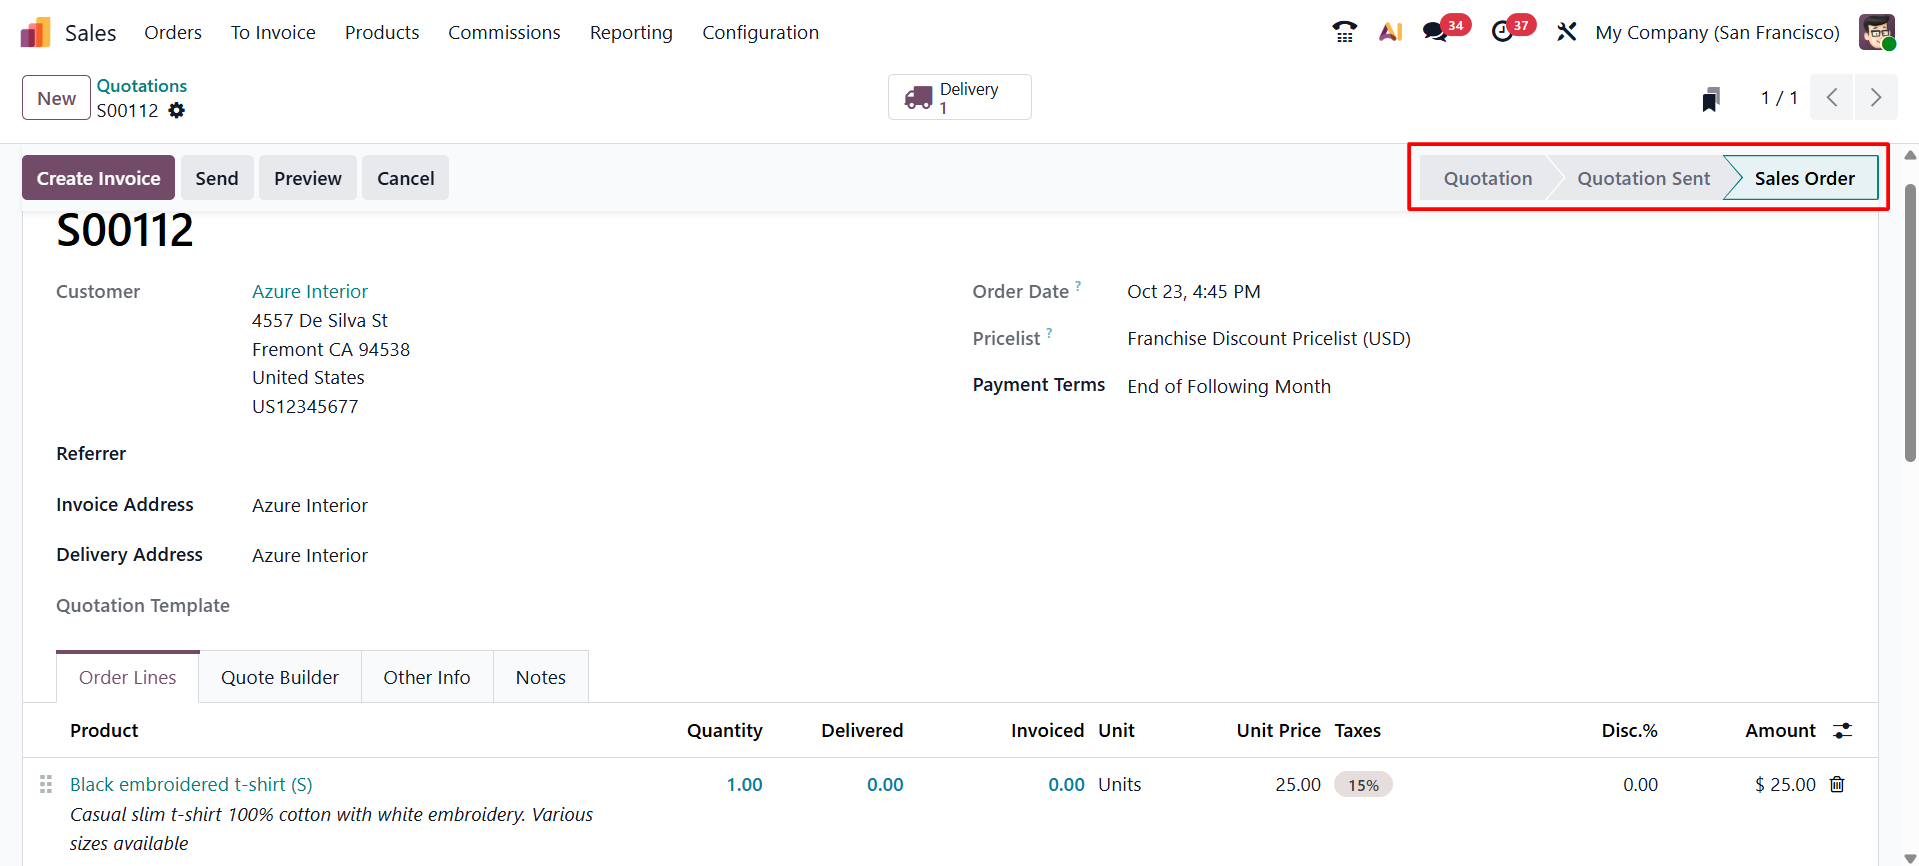
Once the customer accepts the offer, open the quotation and verify its details. Click Confirm to convert it into a sales order, which becomes the main document for coordinating fulfilment and billing.
Review the accepted quotation. Check customer, products, quantities, prices, taxes, and terms.
Click Confirm. Odoo updates the document status to Sales Order.
Check linked records. Depending on configuration and order, the sales order may display links or smart buttons for delivery orders and invoices.
5. Process and Validate the Delivery
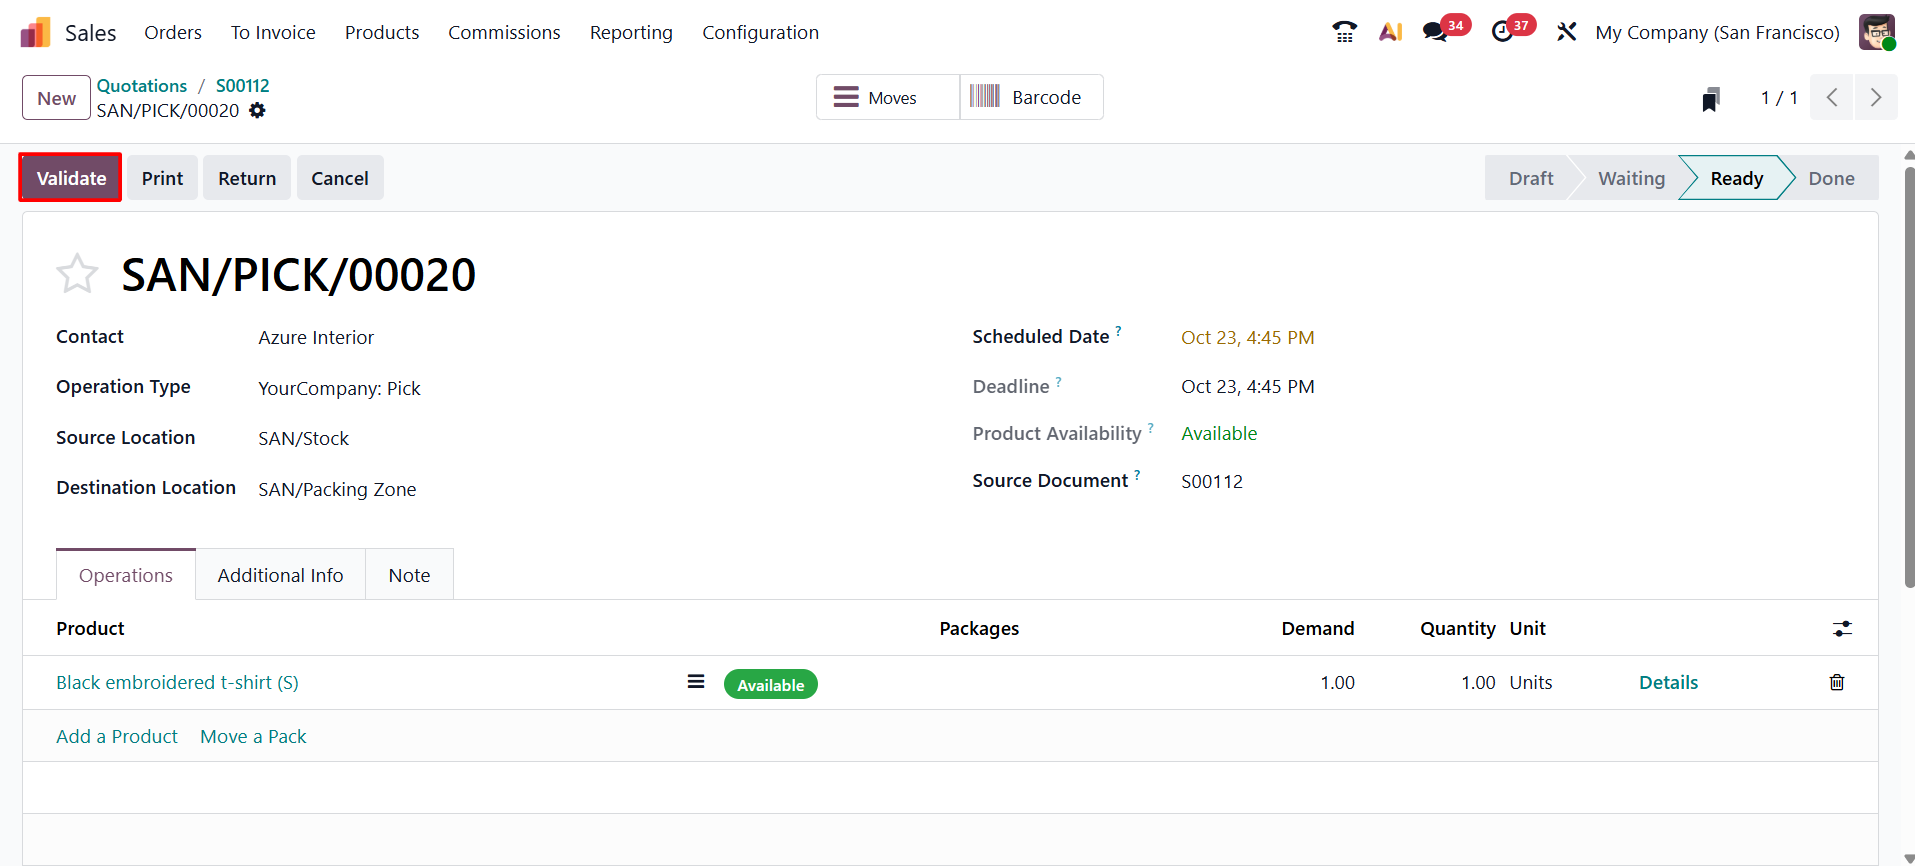
For stockable products, confirming a sales order typically creates a delivery operation in Inventory. The warehouse team uses the transfer to prepare the required products and record the stock movement when goods are dispatched.
Open the delivery order. Use the Delivery smart button on the sales order or go to Inventory → Operations → Deliveries.
Check availability. Review the demanded quantity and the quantity available to deliver.
Prepare the shipment. Reserve products and enter the quantities actually picked. If the full quantity is unavailable, follow the appropriate partial-delivery or backorder process.
Validate the transfer. When goods are ready to leave the warehouse, click Validate to record the delivery.
A warehouse delivery may not be required for service-only orders. The next action depends on product type and the company's invoicing policy.
6. Create and Post the Customer Invoice
A customer invoice records the amount payable for the sale. When an invoice can be created depends on the product's invoicing policy and the business workflow.
Invoice based on ordered quantities
With an ordered-quantity policy, invoicing can generally begin from the confirmed sales order without waiting for delivery. This may suit businesses that invoice before shipment or invoice services based on ordered quantities.
Invoice based on delivered quantities
With a delivered-quantity policy, the relevant product quantity must be delivered before it can be invoiced. This is useful when the invoice should reflect the quantity actually supplied. Partial deliveries can be invoiced according to quantities delivered and the configured workflow.
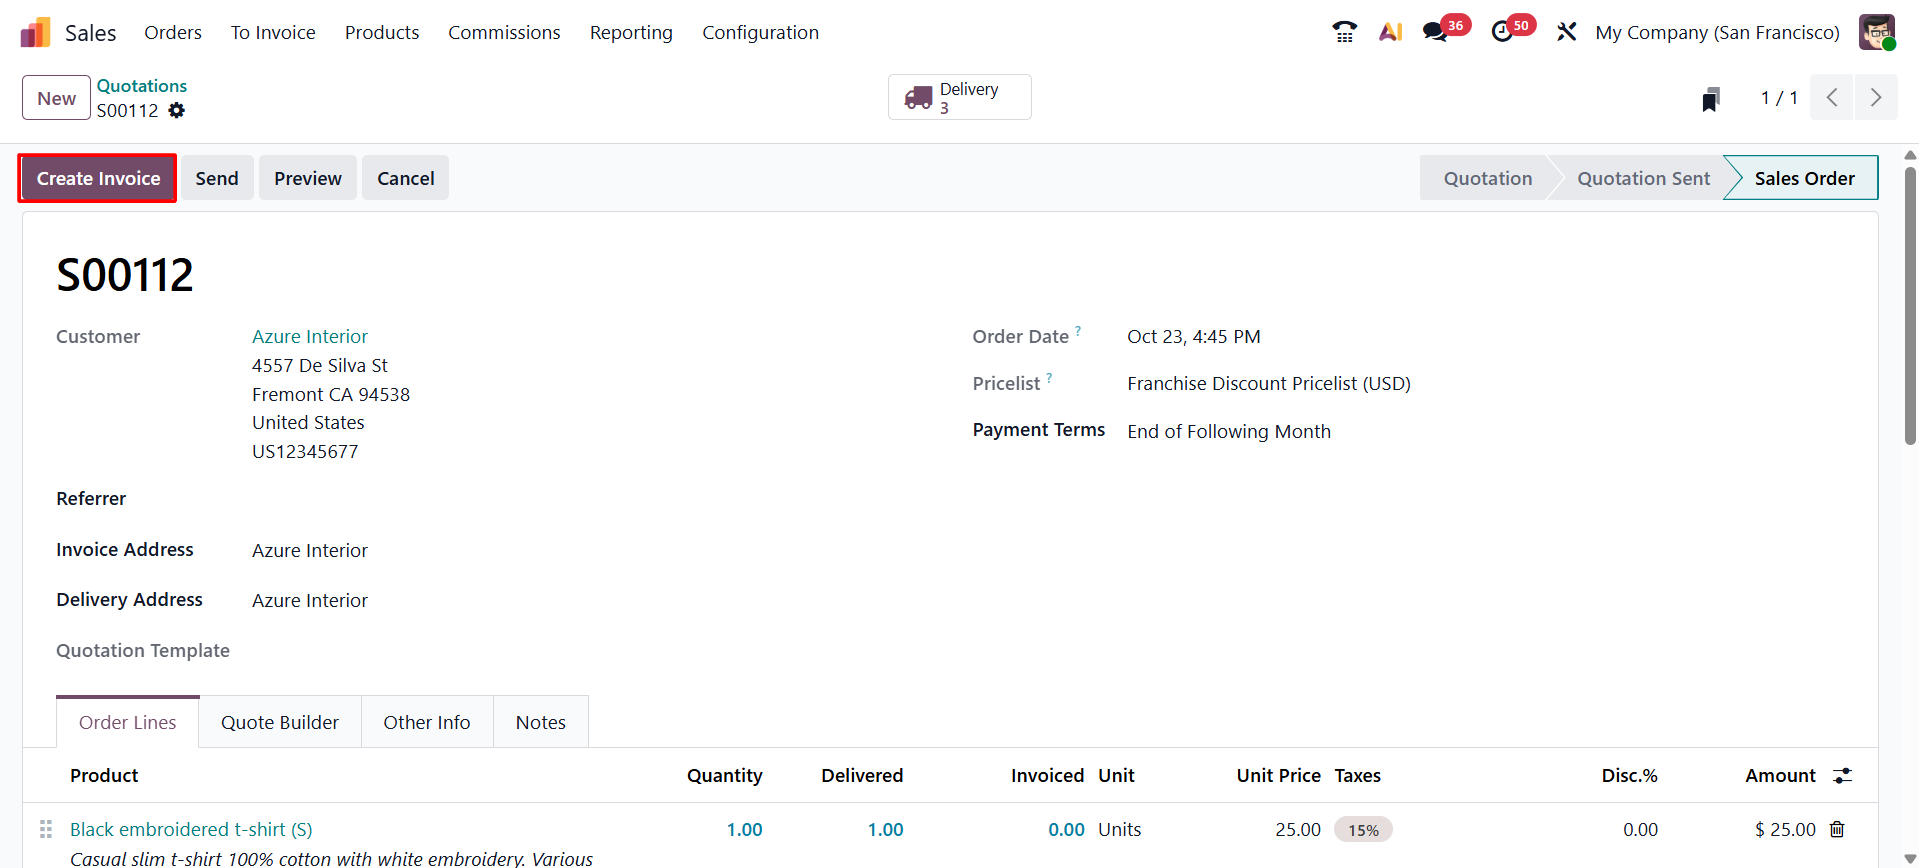
Create the invoice: Return to the sales order and click Create Invoice.
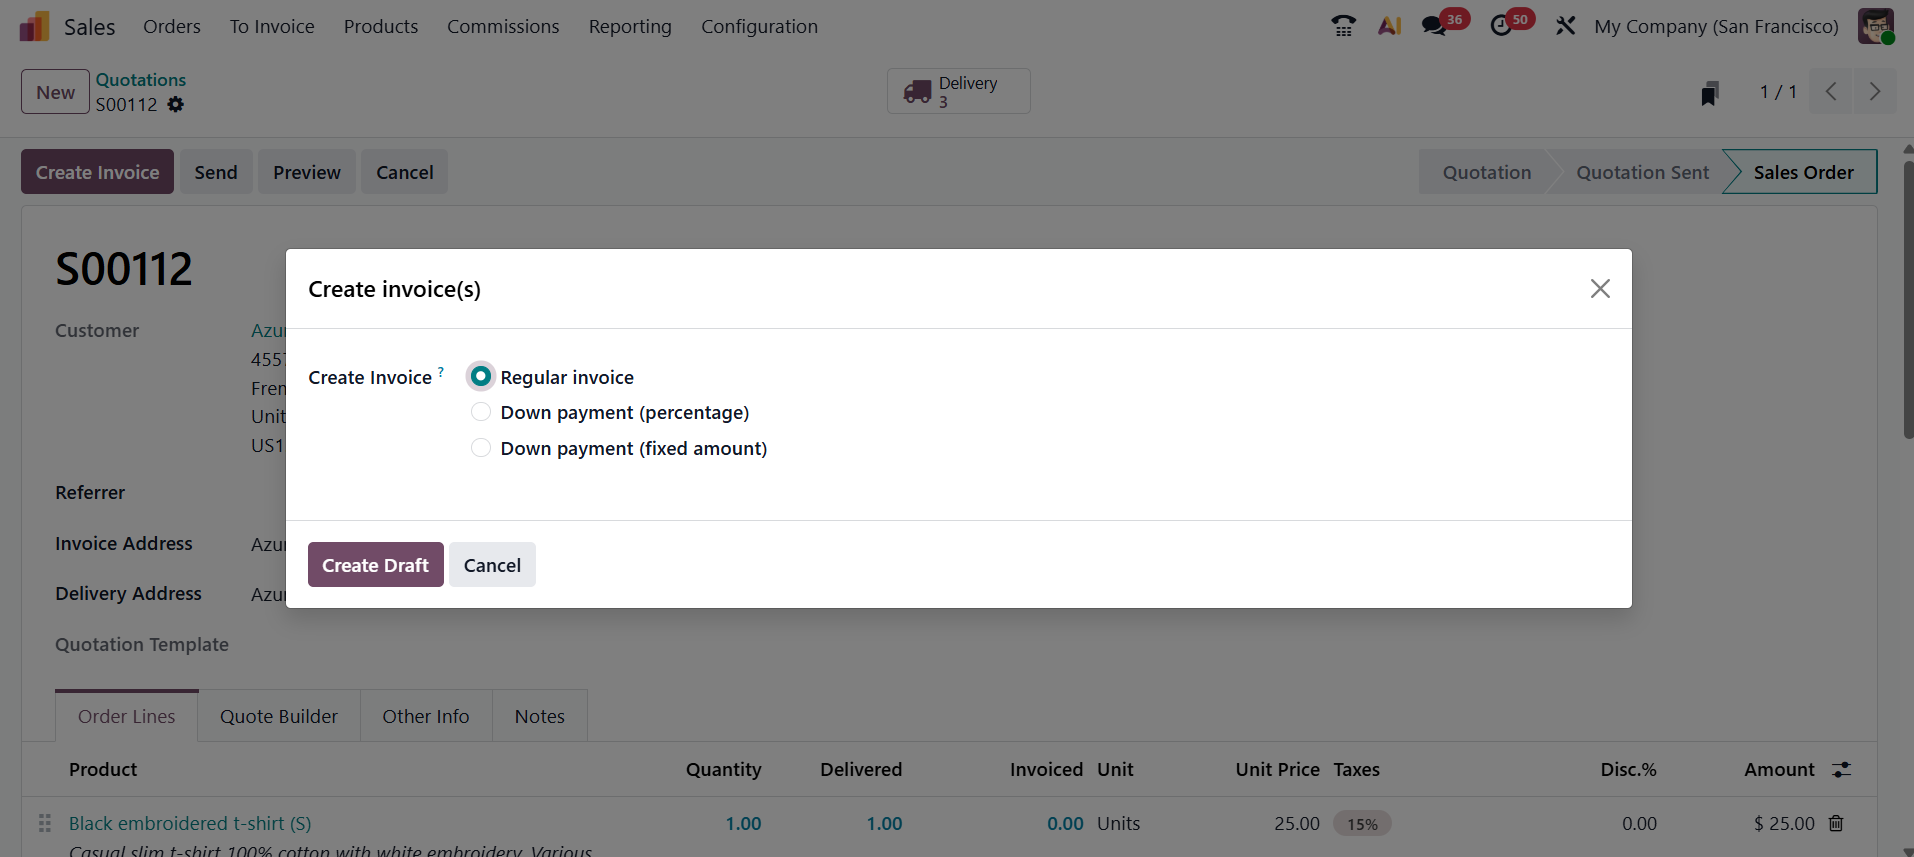
Choose the invoice option: If prompted, select
the appropriate option, such as a regular invoice or a down payment.
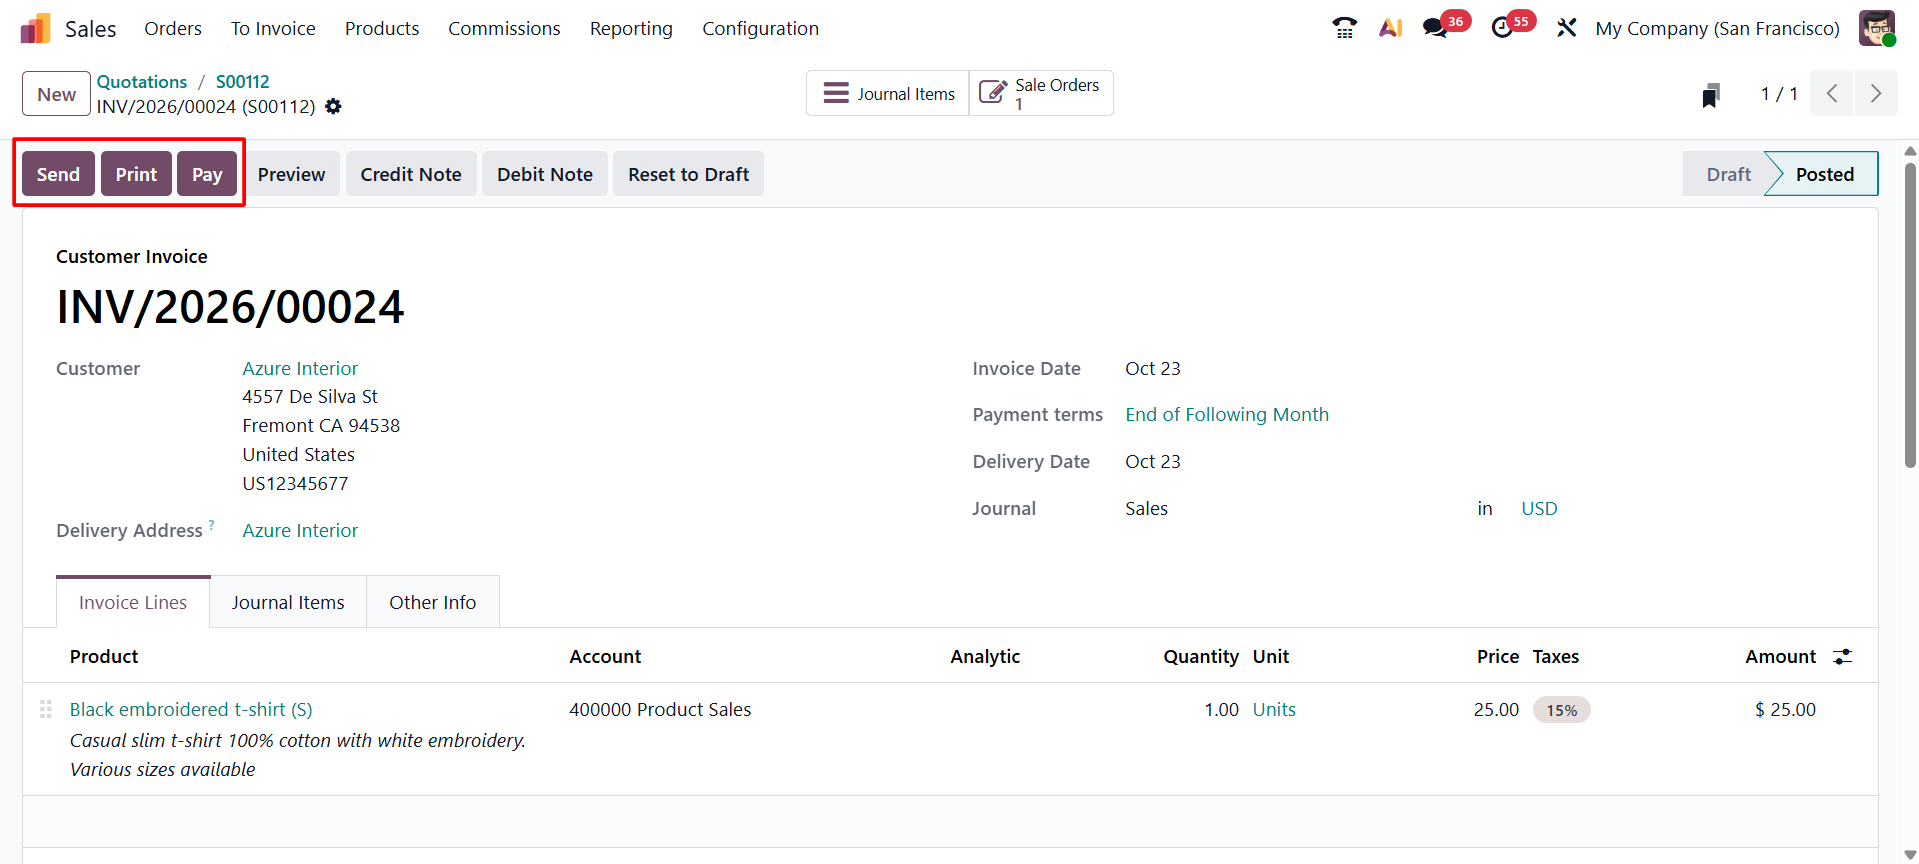
Review the draft invoice: Check customer,
invoice date, product lines, quantities, taxes, payment terms, and total.
Confirm or post the invoice: Validate the invoice using the available action in your Odoo interface.
Send the invoice: Use the available email or Send & Print option to share the invoice with the customer.
7. Register the Customer Payment
When payment is received, record it against the customer invoice. This keeps receivable balances accurate and helps identify invoices that are paid, partially paid, or still outstanding.
Open the posted invoice: Review the amount due.
Click Register Payment: Choose the appropriate journal or payment method, payment date, and amount received.
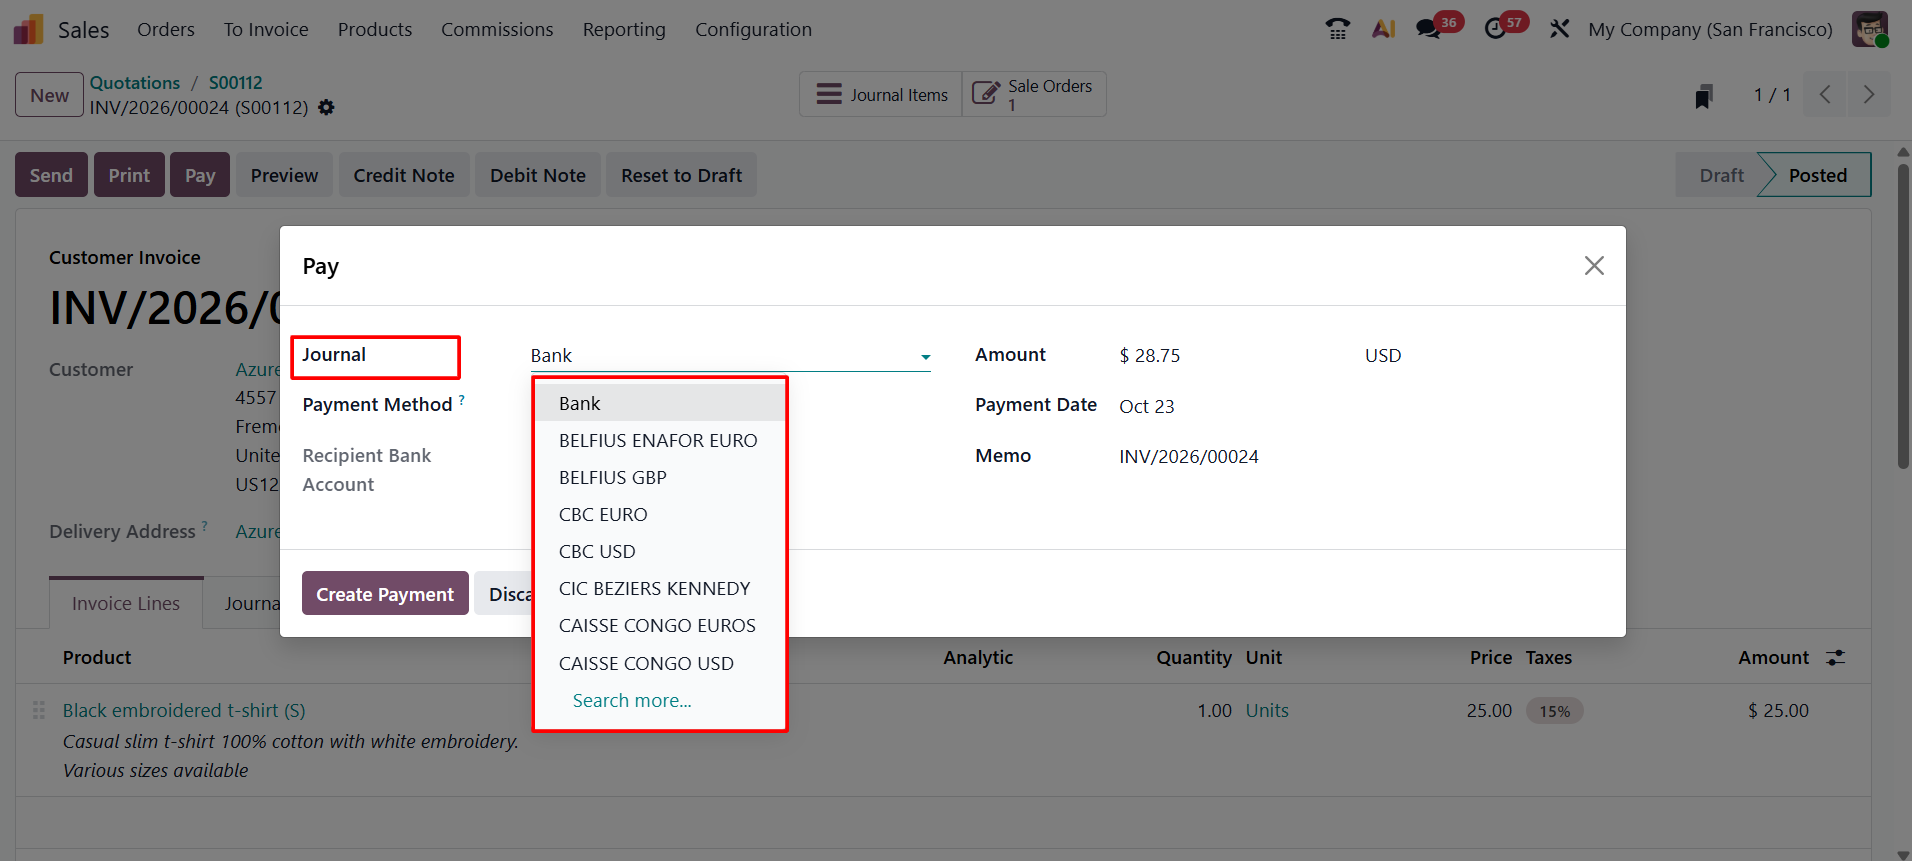
Verify and register the payment: Check the details and confirm the payment.
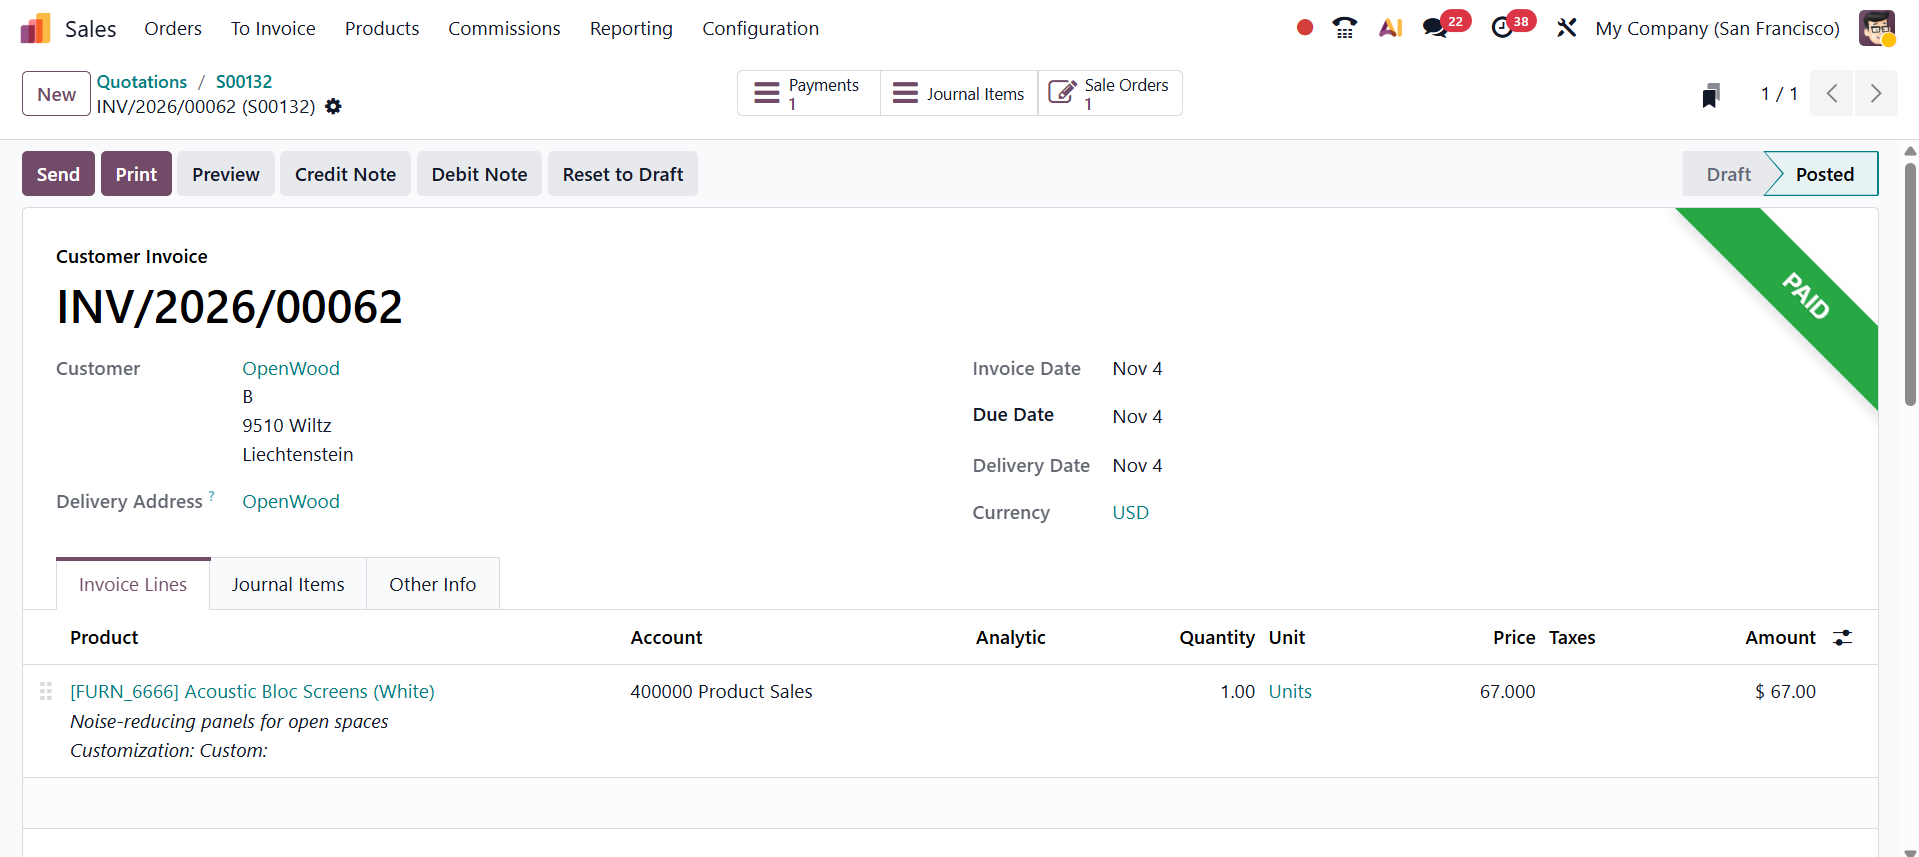
Review the invoice status: Depending on the accounting setup, bank reconciliation or matching may be required before the invoice is fully settled.
For a partial payment, register the amount received and leave the remaining balance open for follow-up through the normal receivables process.
8. Review Sales Orders and Reports
After delivery, invoicing, and payment, return to the sales order to review its linked records. This provides a traceable view of the transaction from the initial quotation to fulfilment and billing.
Review delivery status and quantities delivered.
Check invoice status and identify any outstanding customer balance.
Open the related invoice or customer ledger when investigating unpaid amounts.
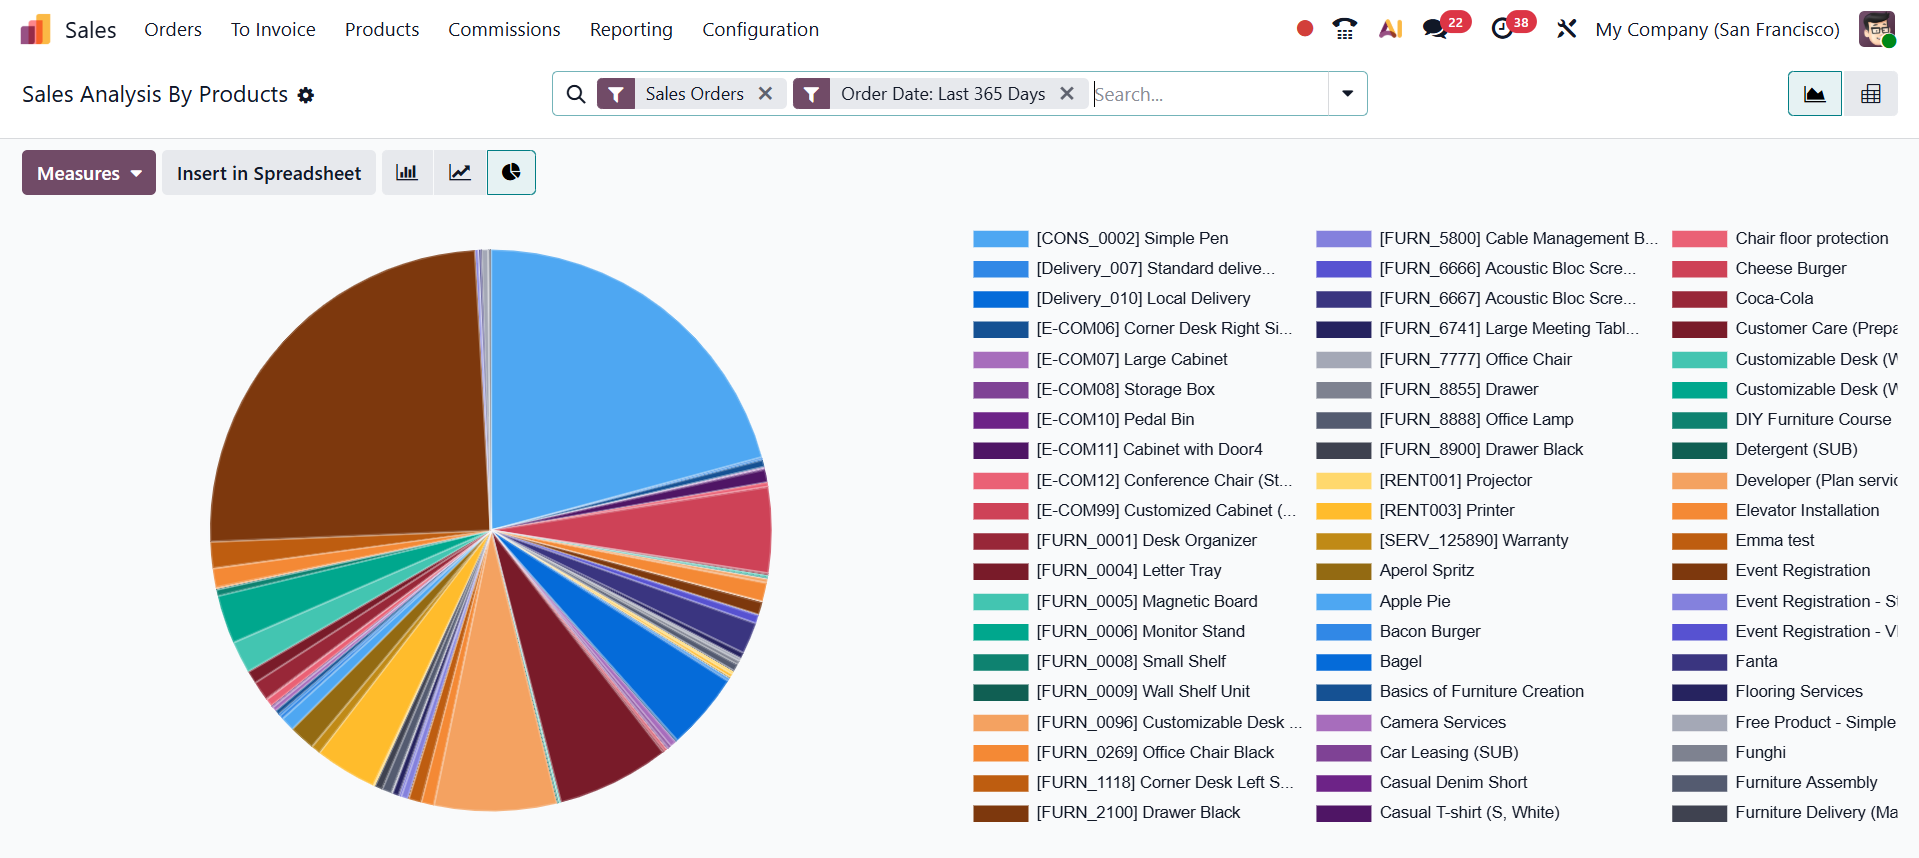
Use Sales reporting to analyze results by product, customer, salesperson, or reporting period.
Conclusion
Odoo 19 simplifies the sales process by integrating quotations, sales orders, deliveries, invoicing, and payments into a single workflow. With proper configuration and accurate business data, companies can streamline sales operations, improve order tracking, and maintain reliable financial records. By following the complete sales cycle, businesses can enhance efficiency, reduce manual effort, and provide a smoother experience for their customers.