
Introduction
A Request for Quotation (RFQ) is used when a company wants to obtain pricing and purchasing information from a vendor before confirming a purchase. In Odoo 20, the Purchase workflow brings vendor information, products, quantities, prices, delivery expectations, and communication together in one document.
Once the quotation is reviewed and accepted, the RFQ can be confirmed as a Purchase Order. If the Inventory workflow is installed, the confirmed order can then be followed through to the related receipt. This guide walks through the RFQ process in Odoo 20 and highlights a few practical improvements that make purchasing easier and more transparent.
RFQ Workflow in Odoo 20
|
Purchase |
Requests for Quotation |
New |
Vendor & Products |
Send RFQ |
Confirm Order |
Receipt |
The overall process is simple: create the RFQ, select the
vendor, add products and purchasing details, send the quotation, confirm the
order once approved, and process the receipt when the products arrive.
1. Create a New RFQ
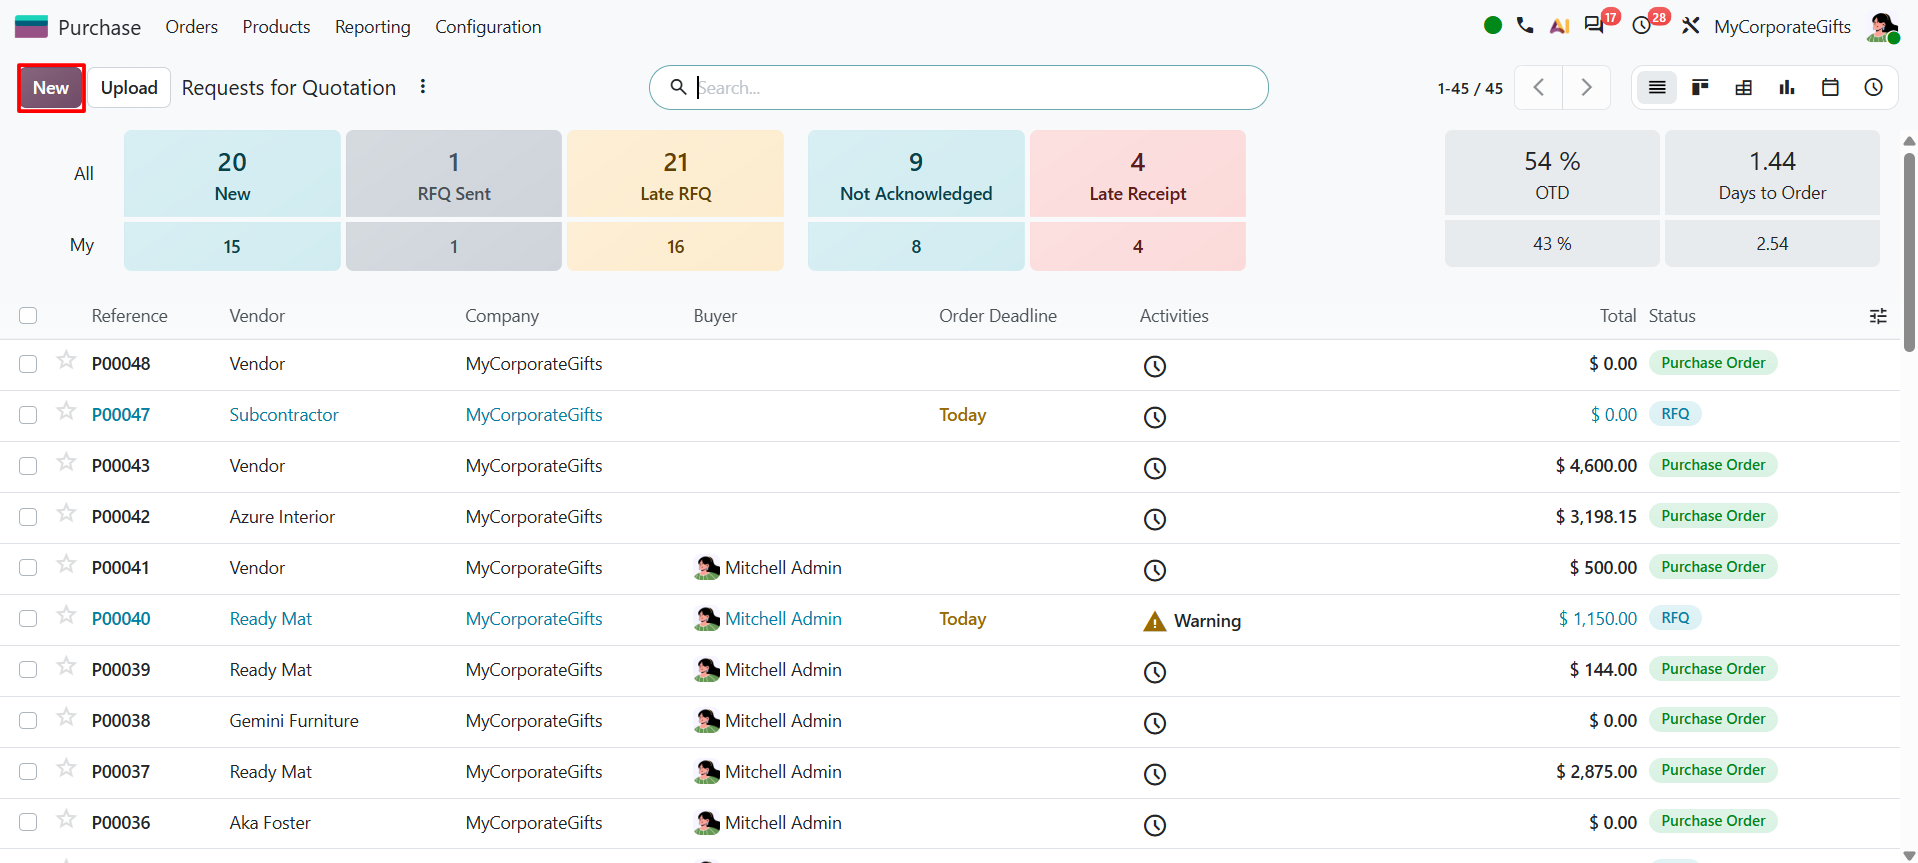
Start by opening the Requests for Quotation area in the Purchase app. From here, purchasing users can review existing quotations or create a new RFQ.
Go to Purchase → Orders → Requests for Quotation, then click New.
Odoo opens the purchasing form used for the quotation. While the document is in the quotation stage, it is treated as an RFQ; after confirmation, it becomes a Purchase Order.
2. Enter the Vendor
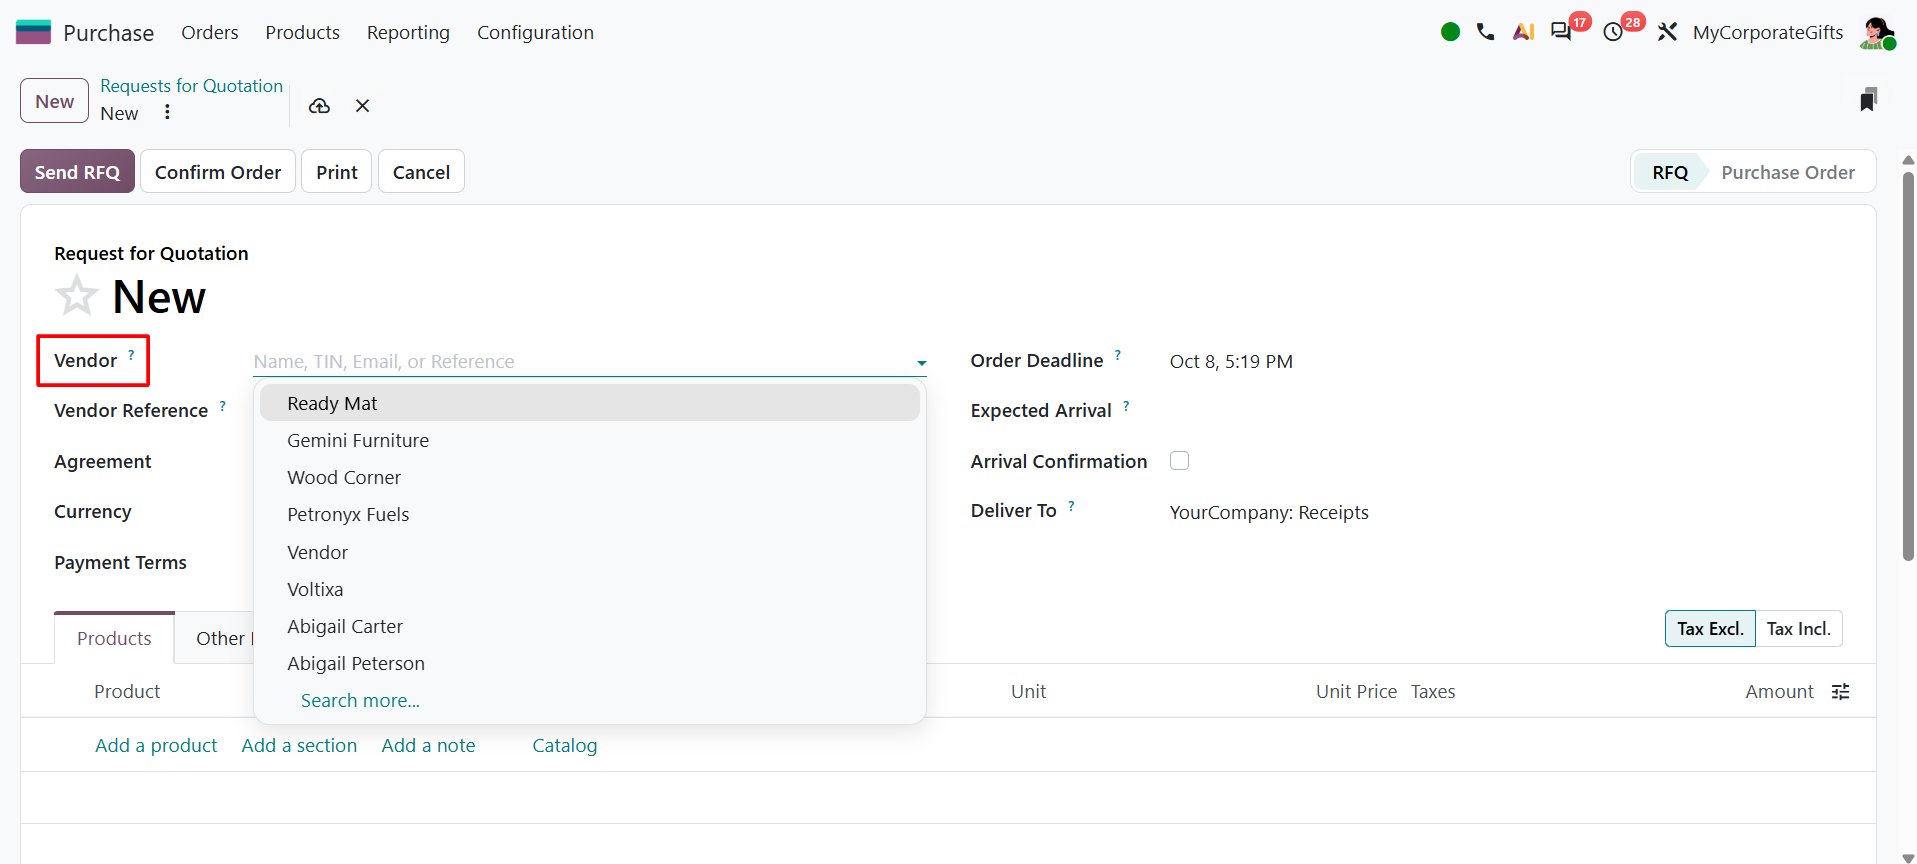
After clicking New, select the required Vendor. Selecting the vendor is important because vendor-specific purchasing information, such as configured prices and delivery lead times, may be used when products are added.
3. Enter the RFQ Details
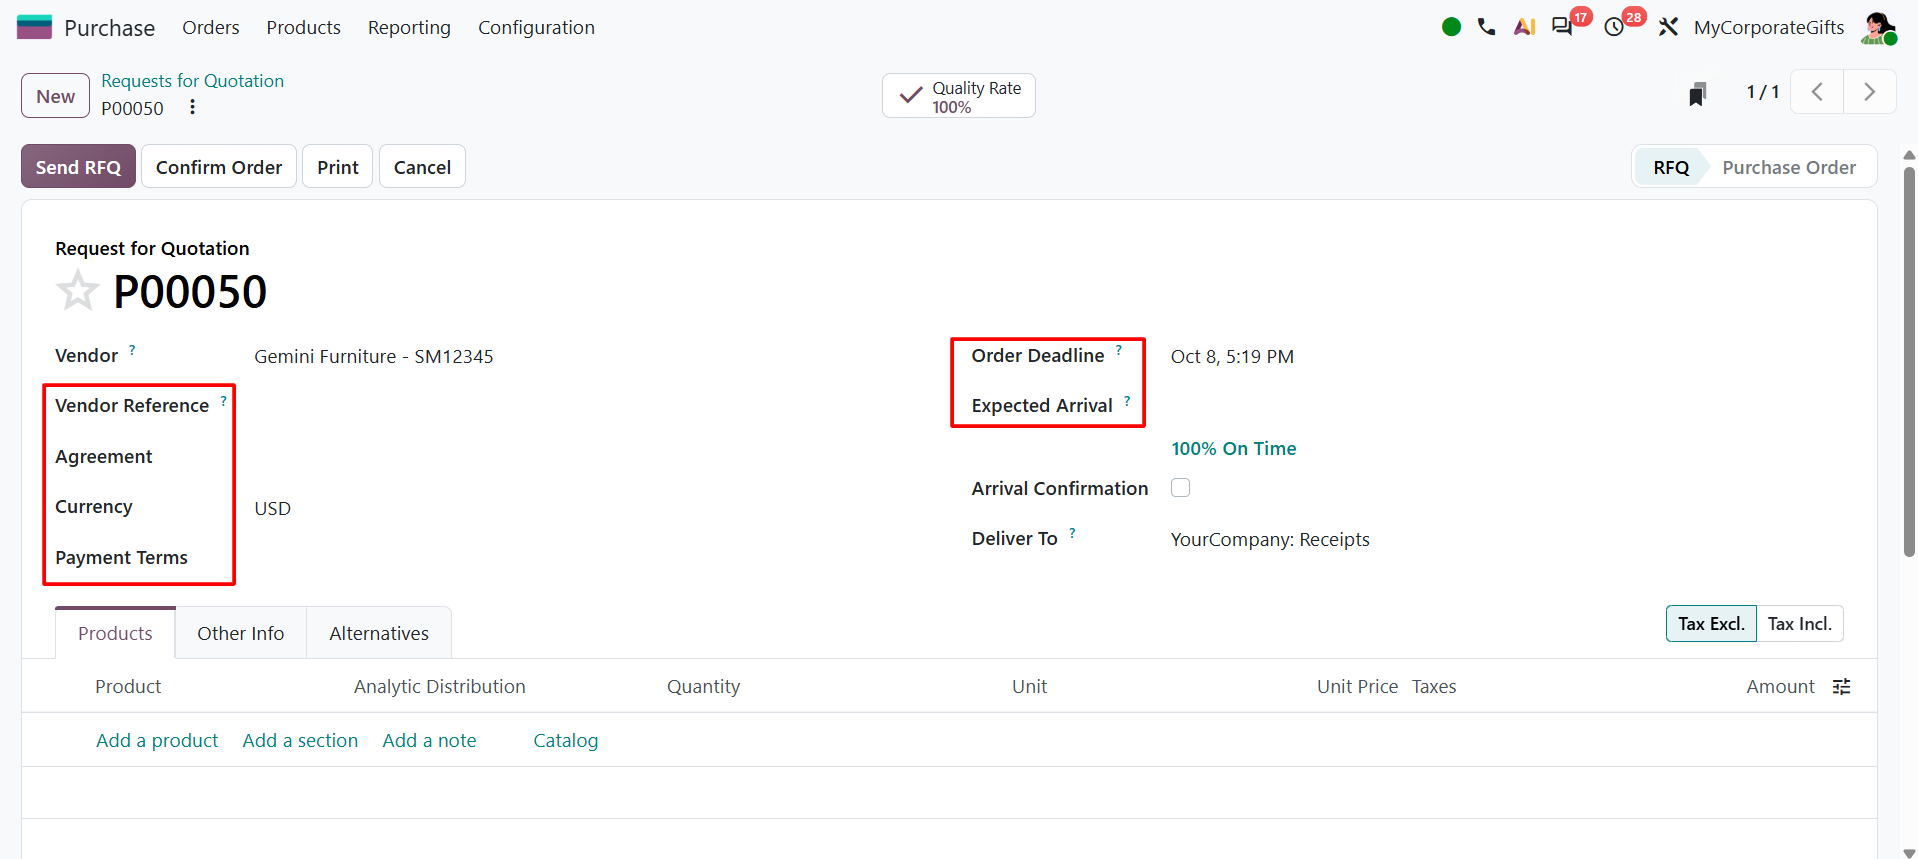
Enter the relevant RFQ information. Vendor Reference can be used to record the supplier's quotation or reference number, while Agreement can associate the RFQ with an existing purchasing agreement when that functionality is configured.
Set the Order Deadline for the vendor response and review the Expected Arrival date. When available, Arrival Confirmation can be used when the vendor needs to confirm delivery timing. Deliver To identifies the warehouse operation or receiving destination used for the purchase.
4. Add Products and Review Pricing
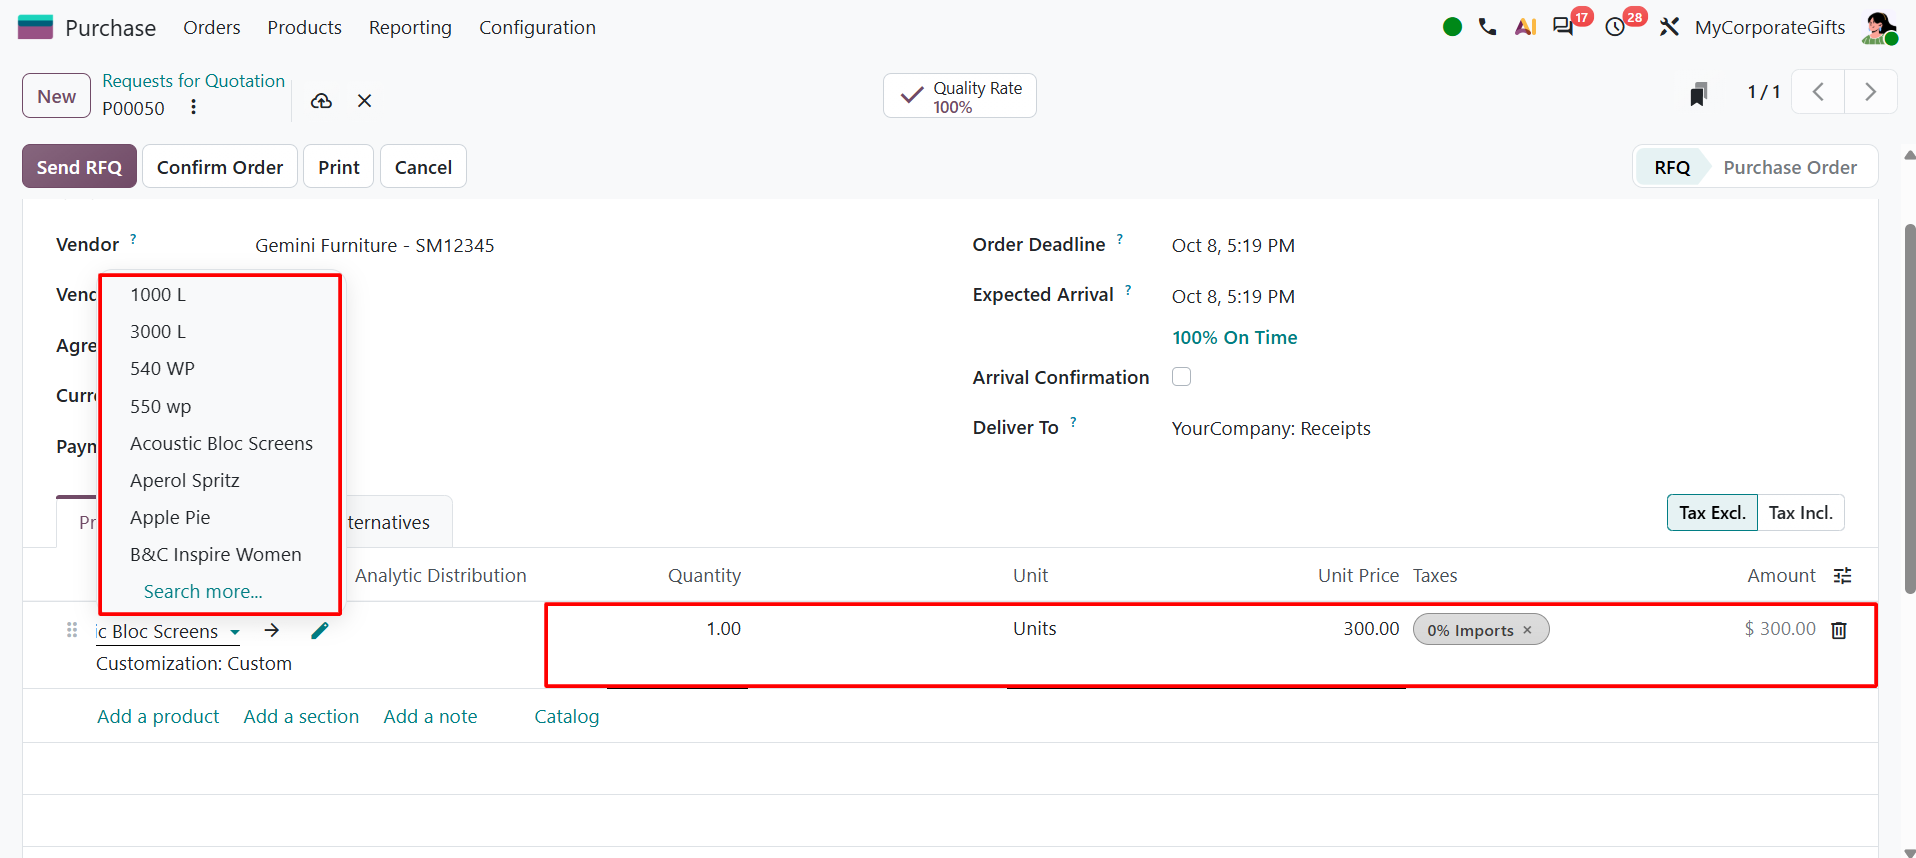
Open the Products tab and add the products required for the purchase. On the RFQ, open Products and click Add a product. Select the required product and review the purchasing values. Review the product line for Quantity, Unit, Unit Price, Taxes, and product description where applicable. If vendor-specific purchasing information is configured, Odoo can use it when the product is added.
The Catalog option can also be used to browse available
products and add them to the RFQ, which is useful when working with a larger
product range.
Odoo 20 Improvement: Tax Excl. / Tax Incl.
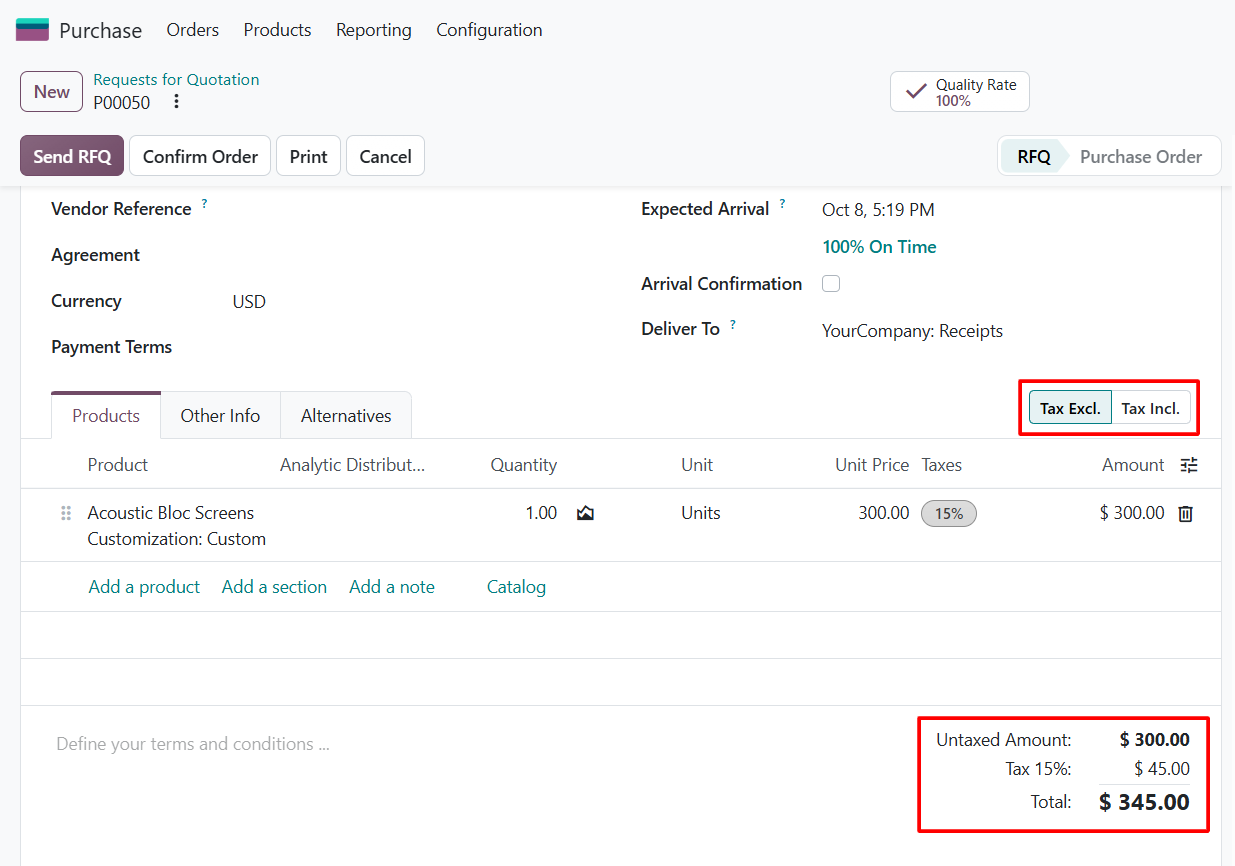
Odoo 20 provides a Tax Excl. / Tax Incl. switch above the product lines. It determines whether the prices entered on the RFQ are treated as tax-exclusive or tax-inclusive.
This is especially useful when a vendor provides a quotation with taxes already included. The purchaser can select Tax Incl. and enter the quoted amount directly. The selected pricing method is also carried forward when the RFQ is converted into a vendor bill.
5. Review the Other Info Tab
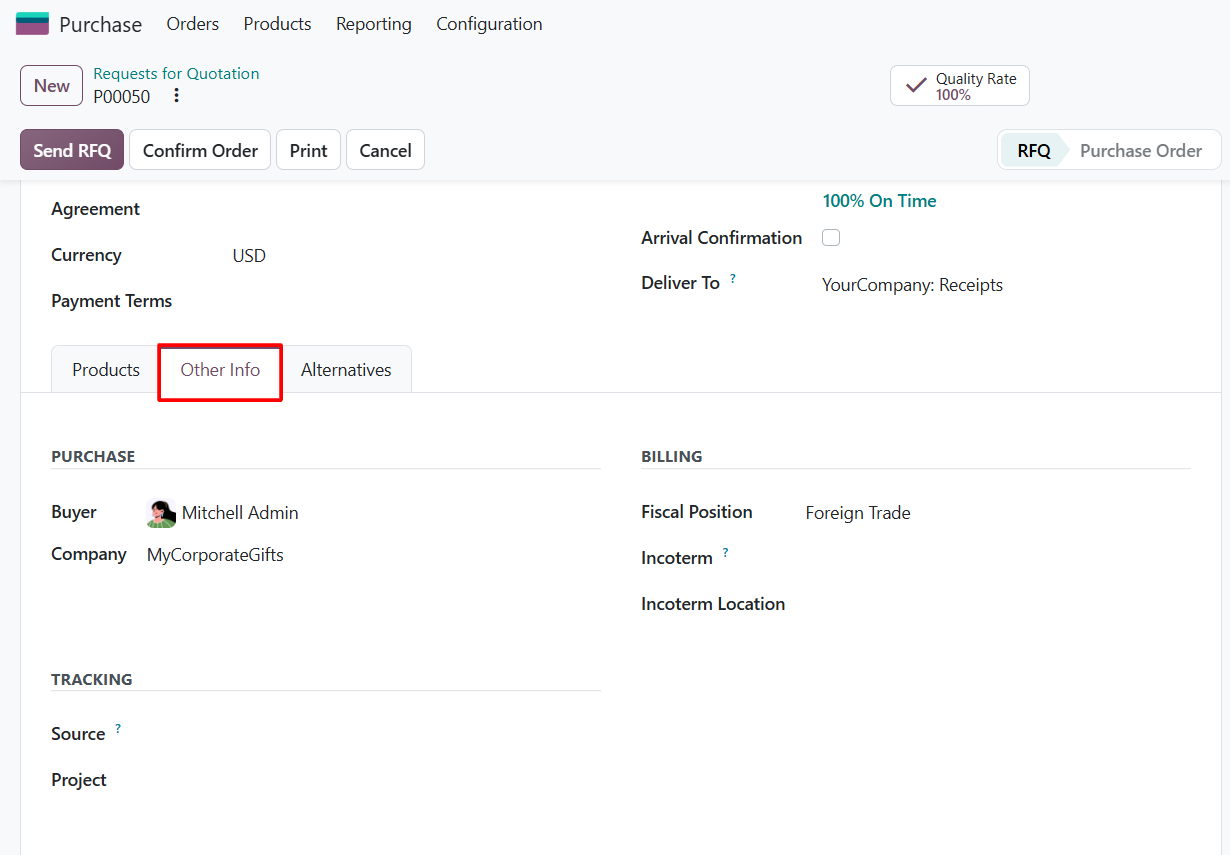
Use the Other Info tab to review additional purchase,
billing, and tracking information. Depending on the configuration, this area
includes Buyer, Company, Billing Status, Fiscal Position, Incoterm, and Source
Document.
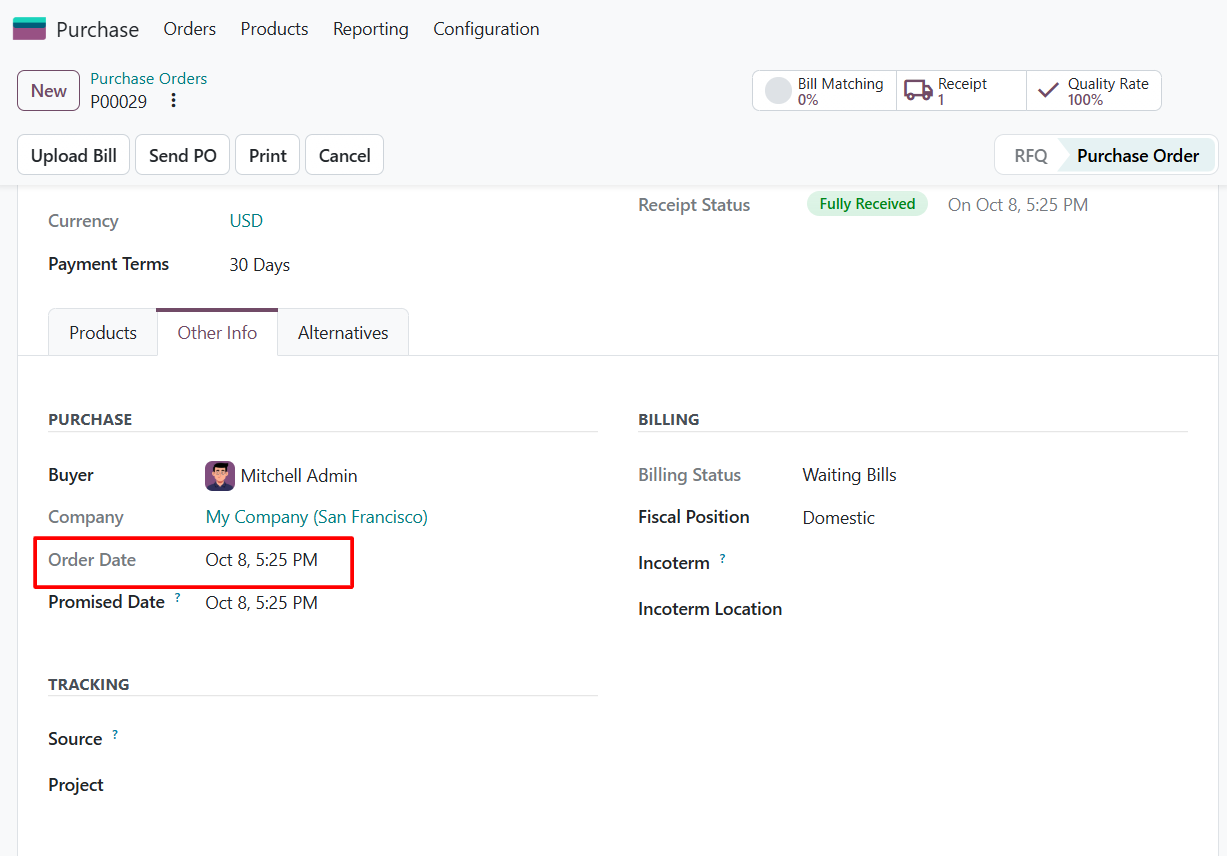
Odoo 20 Improvement: Confirmation Date Is Now Order Date
In Odoo 20, the previous Confirmation Date is referred to as
Order Date. The field is located in the Other Info tab under the Purchase
section, making it easier to review alongside other order information.
6. Send the RFQ to the Vendor
When the RFQ is ready, click Send RFQ to open the email composer. Review the recipient, quotation template, and message, then send the quotation to the vendor.
Keeping the communication within the RFQ helps purchasing teams maintain a traceable record of vendor communication.
7. Print the RFQ and Compare Alternatives
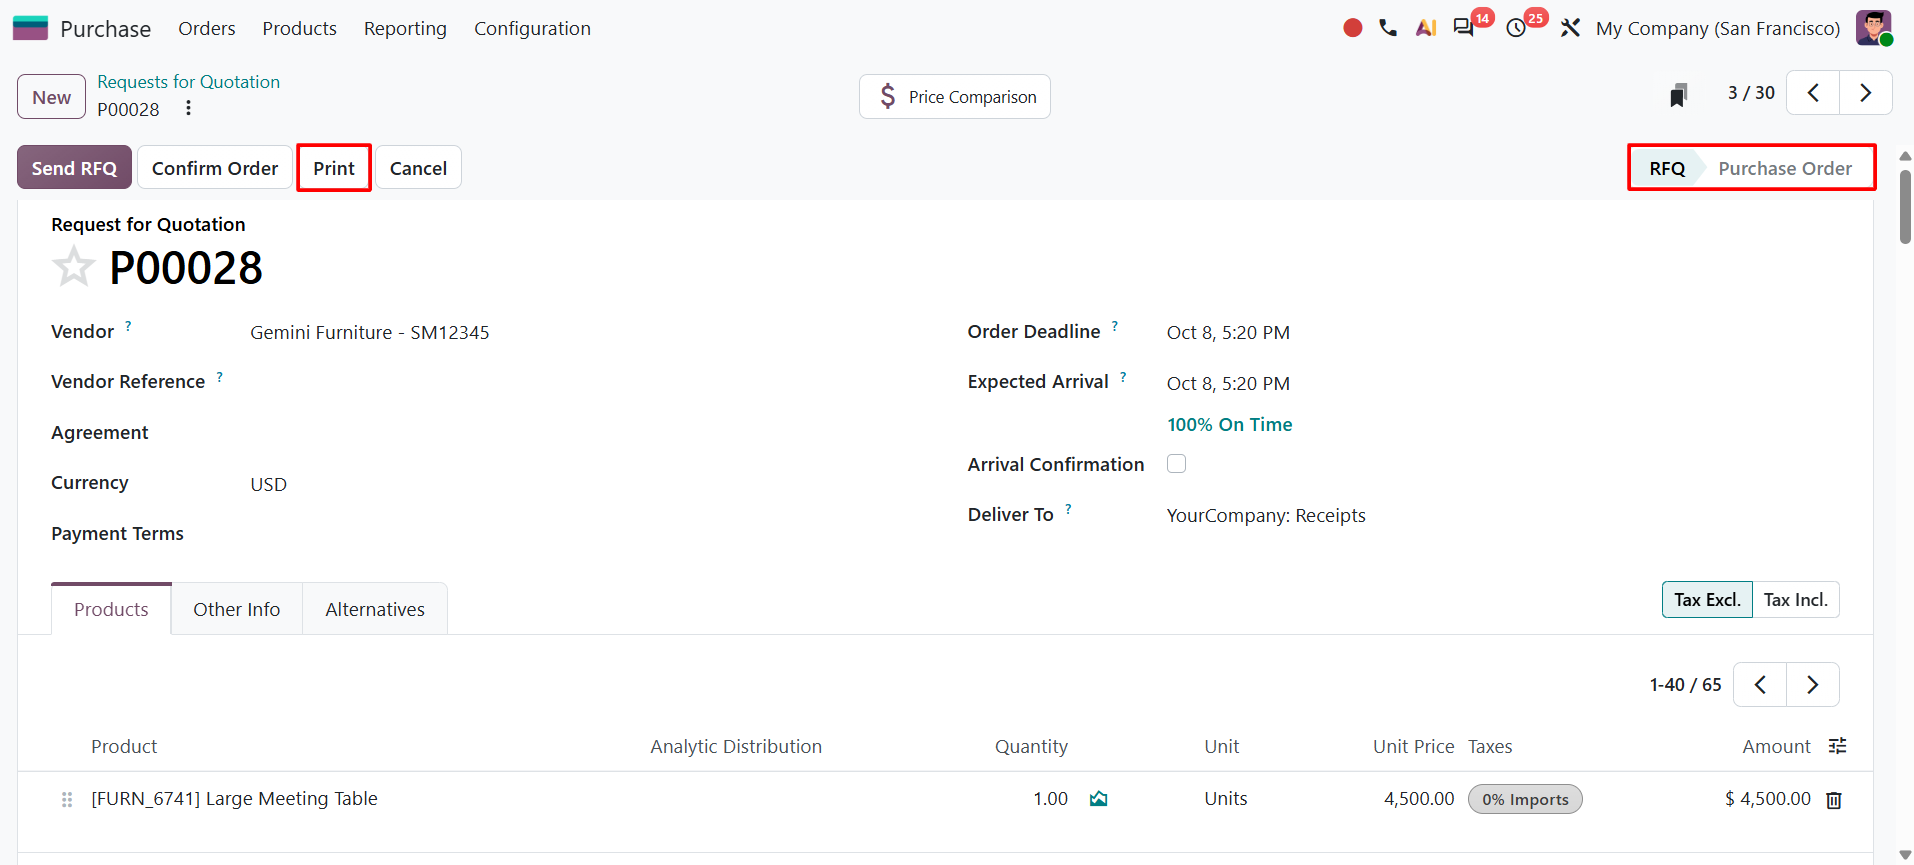
If a PDF or physical copy is required, use Print to generate the RFQ document. The printed quotation can be reviewed or shared separately when needed.
Odoo 20 Improvements:
i) Printing an RFQ Does Not Mark It as Sent
In Odoo 20, printing an RFQ only generates the PDF document. It does not automatically change the RFQ status to Sent. The RFQ is marked as Sent when it is actually sent through the email workflow.
This creates a clearer distinction between a quotation that was printed internally and one that was actually communicated to the vendor.
ii) Compare Alternative Vendor Quotations
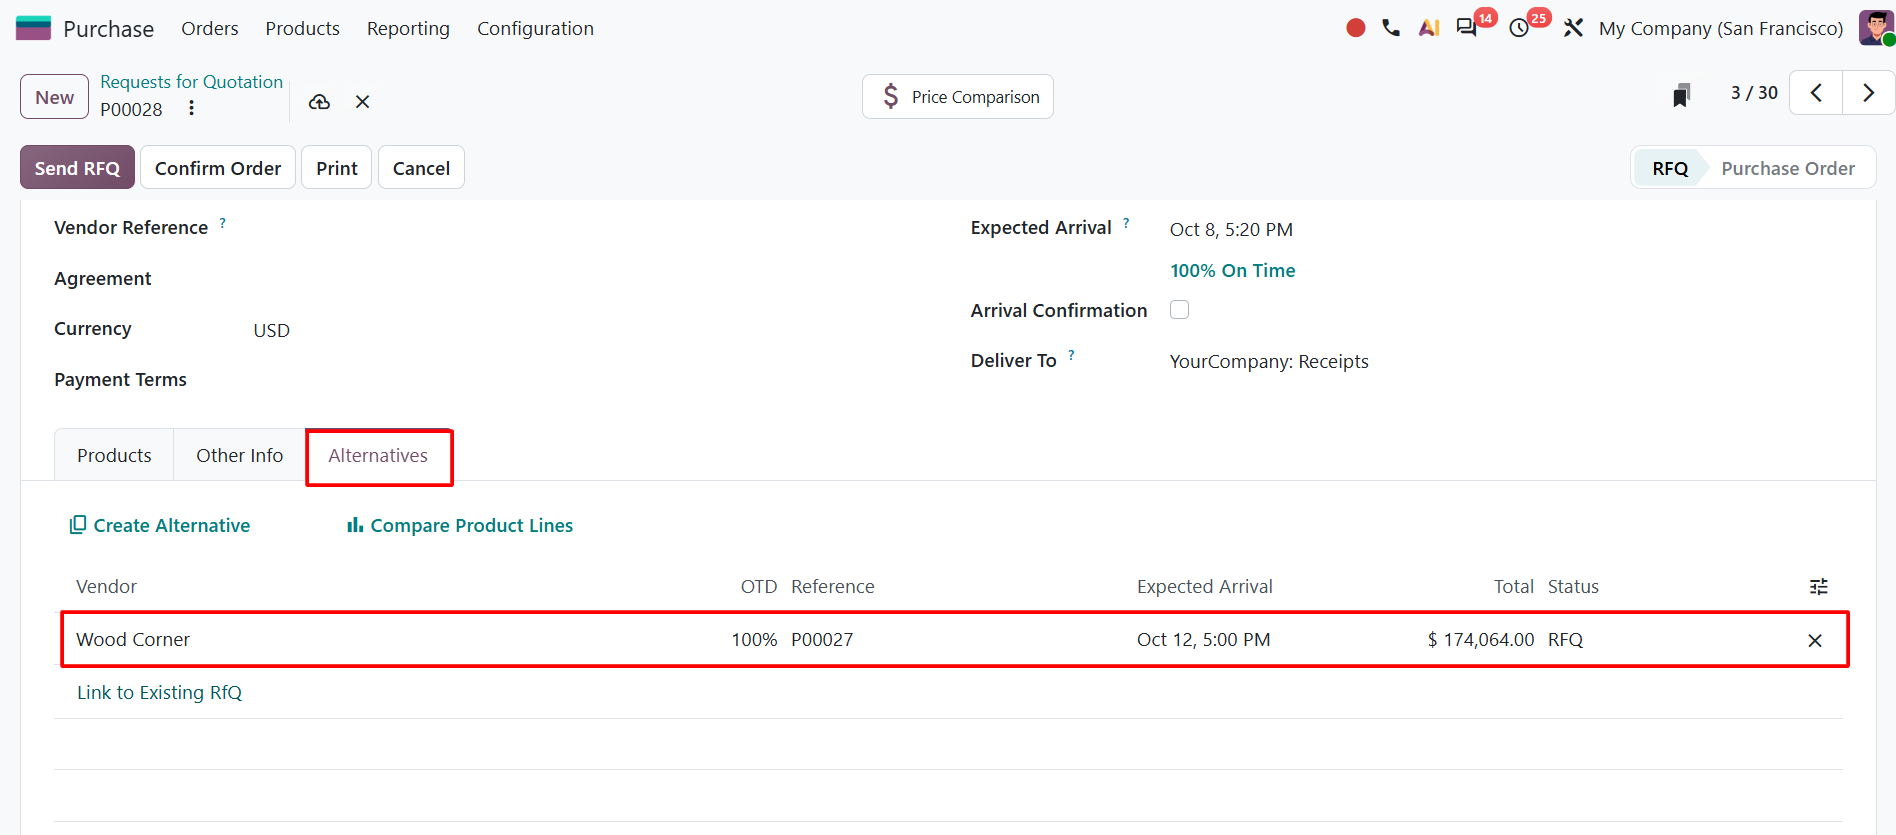
If the company is collecting quotations from multiple vendors, the Alternatives tab can be used to create a related alternative RFQ or link an existing RFQ.
Open Alternatives and use Create Alternative or Link to Existing RFQ. This is an optional purchasing workflow and does not need to be used for a standard RFQ.
8. Confirm the RFQ as a Purchase Order
After the vendor accepts the quotation and the purchasing terms are finalized, return to the RFQ and click Confirm Order.
Odoo converts the RFQ into a confirmed Purchase Order. The confirmed order retains the vendor, products, quantities, prices, and delivery information.
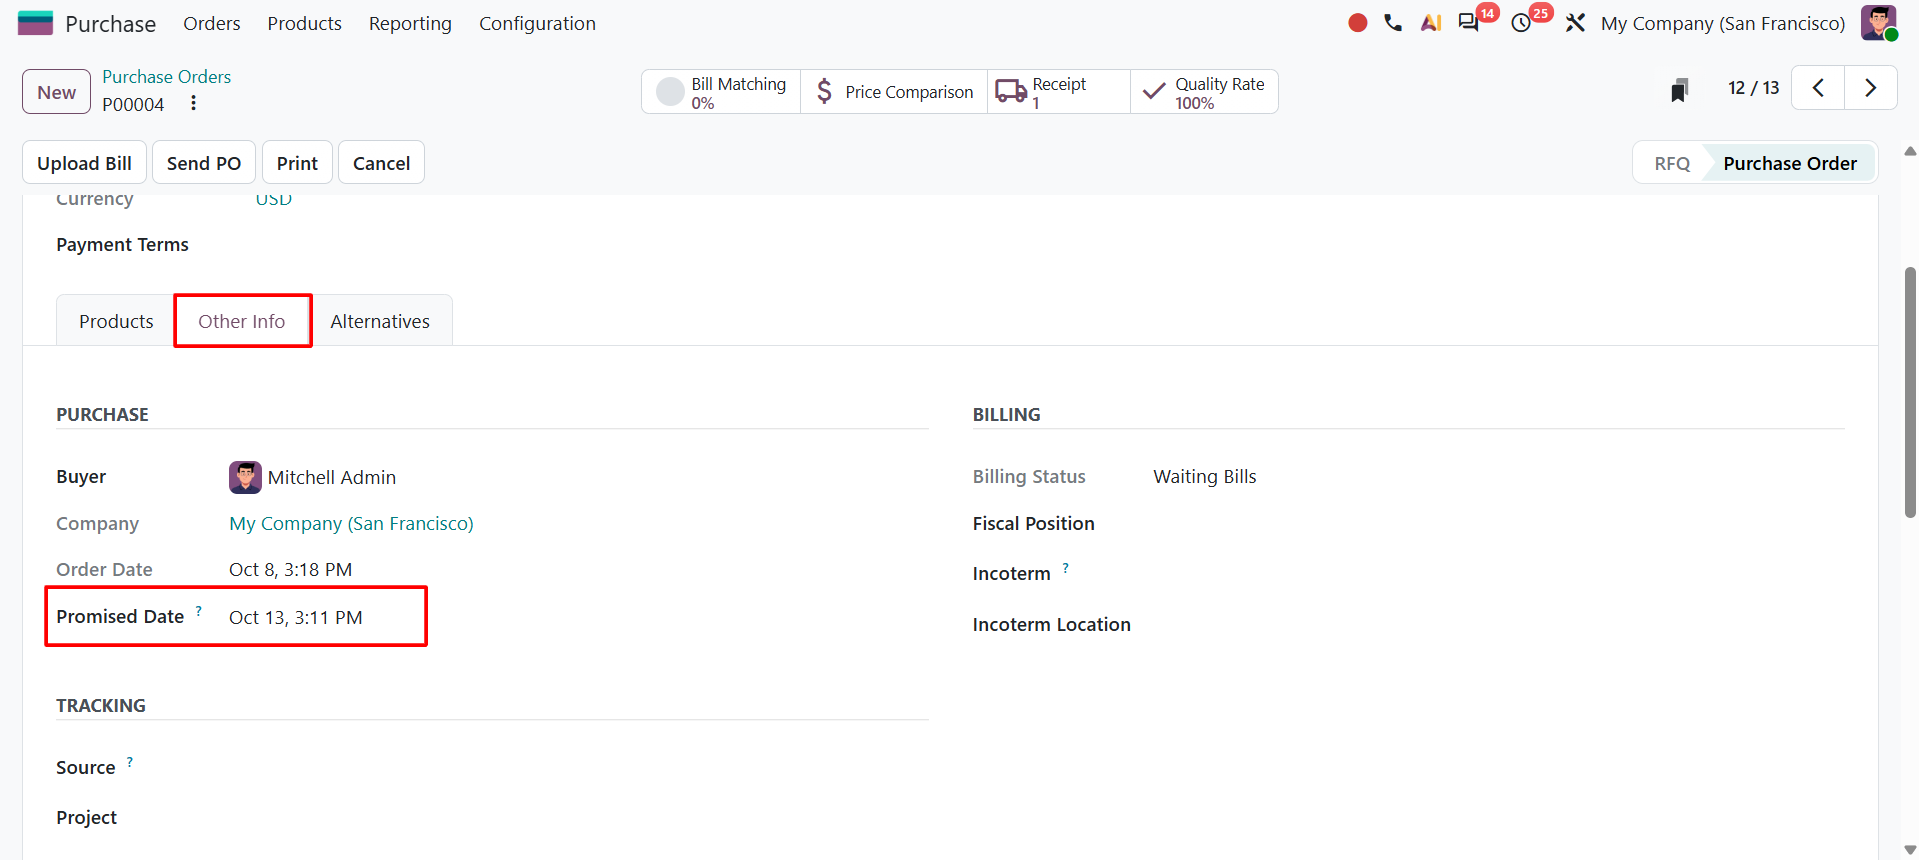
Odoo 20 Improvement: Promised Date
Odoo 20 provides a Promised Date for tracking the delivery date committed by the vendor. When the purchase order is confirmed, the Promised Date is initially based on Expected Arrival and can be adjusted according to the vendor's commitment.
The overall Promised Date can be reviewed from Other Info. It can also be displayed on individual purchase order lines when required. This helps distinguish the system's expected arrival from the date actually promised by the vendor.
9. Receive the Purchased Products
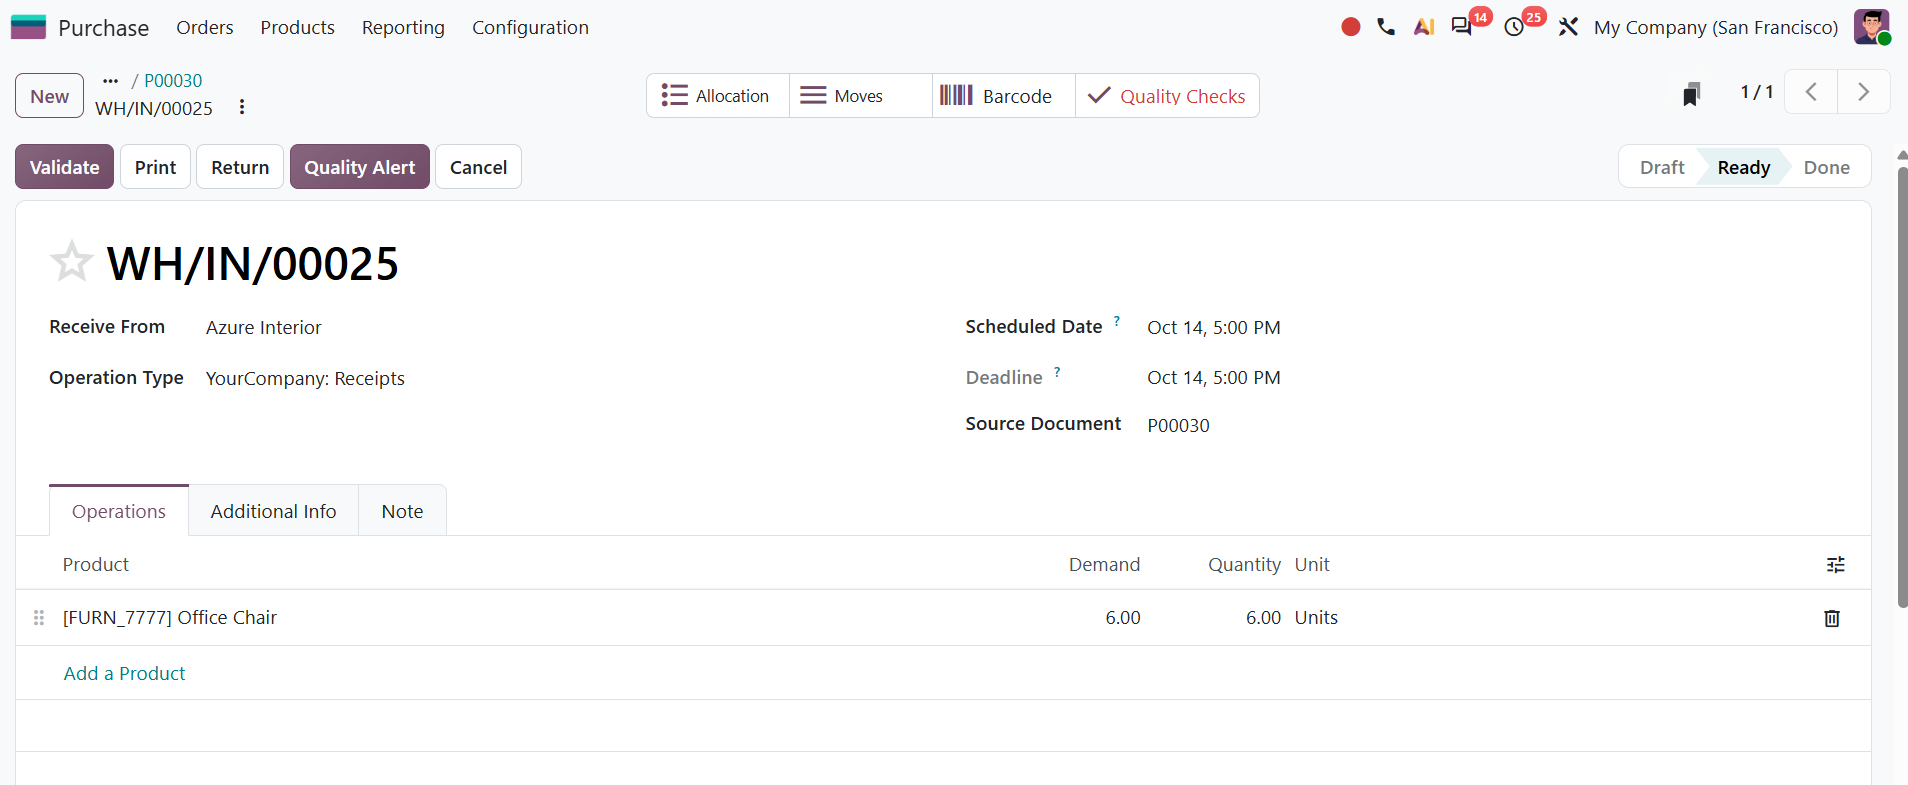
Once the vendor delivers the products, open the receipt linked to the Purchase Order. Verify the received quantities and validate the receipt after confirming the physical delivery.
When Inventory is installed, the validated receipt updates the inventory according to the configured warehouse and product settings.
Conclusion
Creating an RFQ in Odoo 20 provides a structured way to request vendor quotations and convert an approved quotation into a Purchase Order. The workflow brings vendor information, products, pricing, delivery expectations, and communication together in one place.
The selected Odoo 20 improvements make the process more practical. The Tax Excl. / Tax Incl. switch makes it easier to enter vendor prices exactly as quoted, the updated printing behavior keeps the RFQ status accurate, and Promised Date provides a clearer distinction between the vendor's commitment and the system's expected arrival.
With this workflow, purchasing teams can move from RFQ to Purchase Order and, when Inventory is installed, continue through the receiving process with better visibility and control.